Road & Street Builder
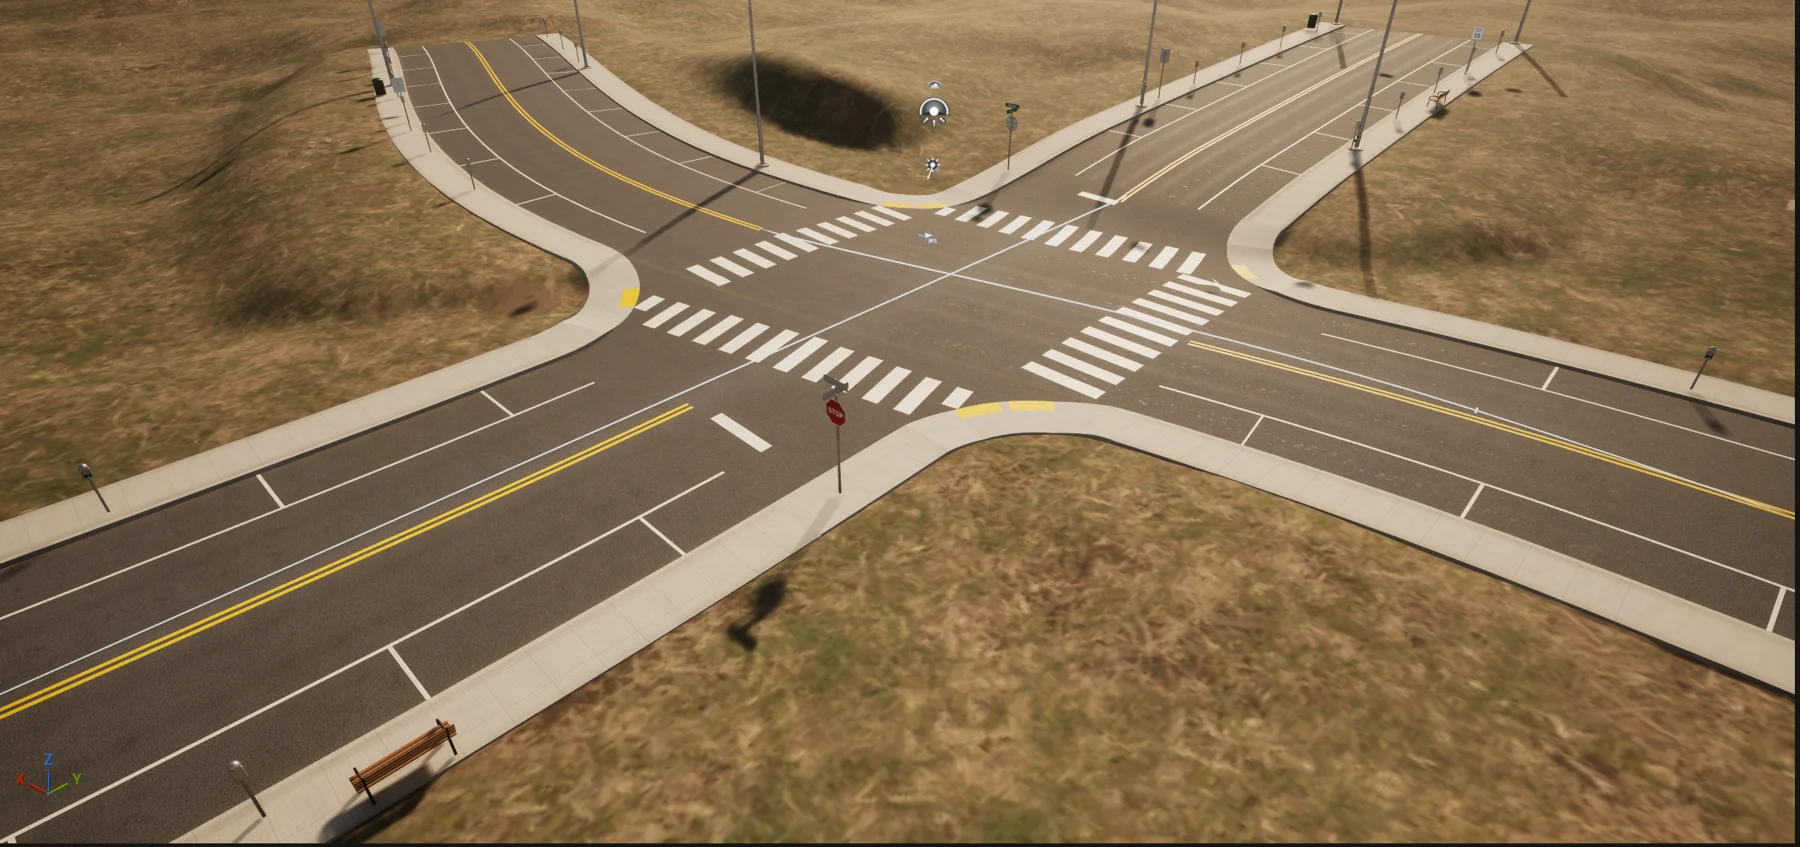
Draw a spline and get a finished street: lanes, curbs, sidewalks, markings, junctions with crosswalks and signals, signs, furniture, bridges and tunnels, graded into your landscape. For Unreal Engine 5.6, 5.7 and 5.8.
1. Install and enable
From Fab:
- In the Epic Games Launcher, open Fab Library, find Exaro Road & Street Builder and click Install to Engine for your engine version (5.6, 5.7 or 5.8).
- Open your project. Go to Edit → Plugins, type
Roadin the search box and tick Exaro Road & Street Builder. - Click Restart Now.
From the Exaro store: the download is one zip with the plugin and ready-built Windows binaries for each engine.
- Copy the
ExaroRoadfolder into your project'sPluginsfolder (createPluginsnext to your.uprojectfile if it is not there). - Open the
Binaries for UE 5.xfolder that matches your engine and copy theBinariesfolder inside it intoPlugins/ExaroRoad/. - Open the project. If Unreal asks, enable the plugin and restart.
On Mac or Linux, or if you skip step 2 and have Visual Studio installed, Unreal builds the plugin from its source when the project opens. INSTALL.txt in the zip has the same steps.
The kit meshes are Nanite. Check Project Settings → Platforms → Windows → D3D12 Targeted Shader Formats includes SM6 (new projects have it already).
To see every feature in one place, open the demo map: in the Content Browser, click Settings → Show Plugin Content, then open Exaro Road & Street Builder Content/Demo/L_ExaroRoad_Demo.
2. Place a road
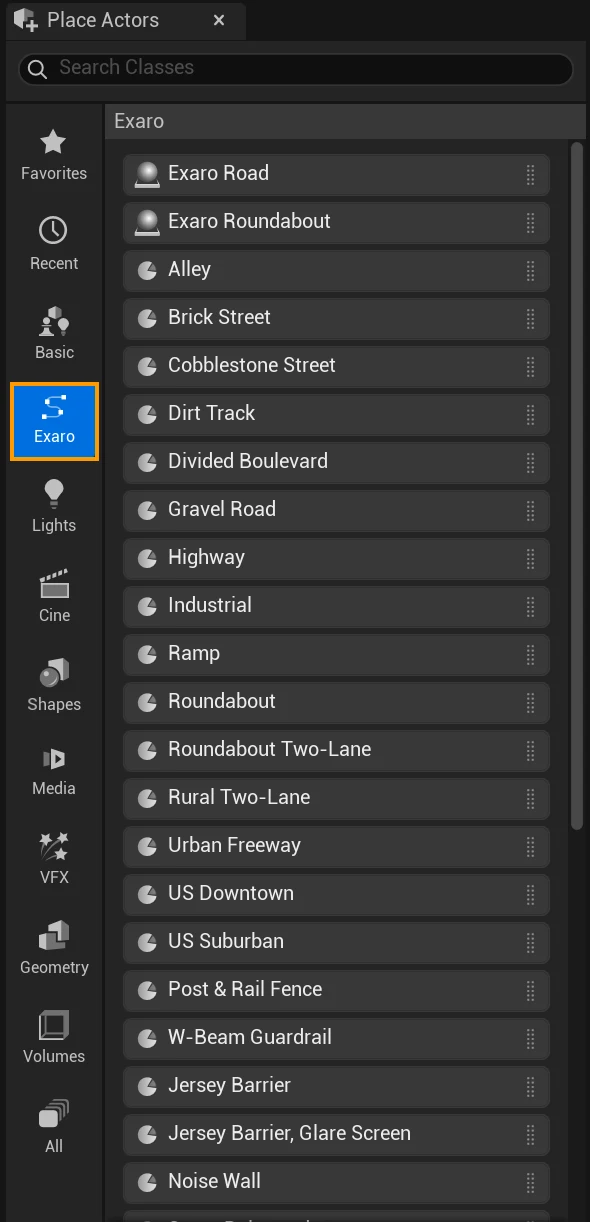
- Open Window → Place Actors if the panel is not already showing.
- Click Exaro in the panel's left column, just under Basic (outlined below).
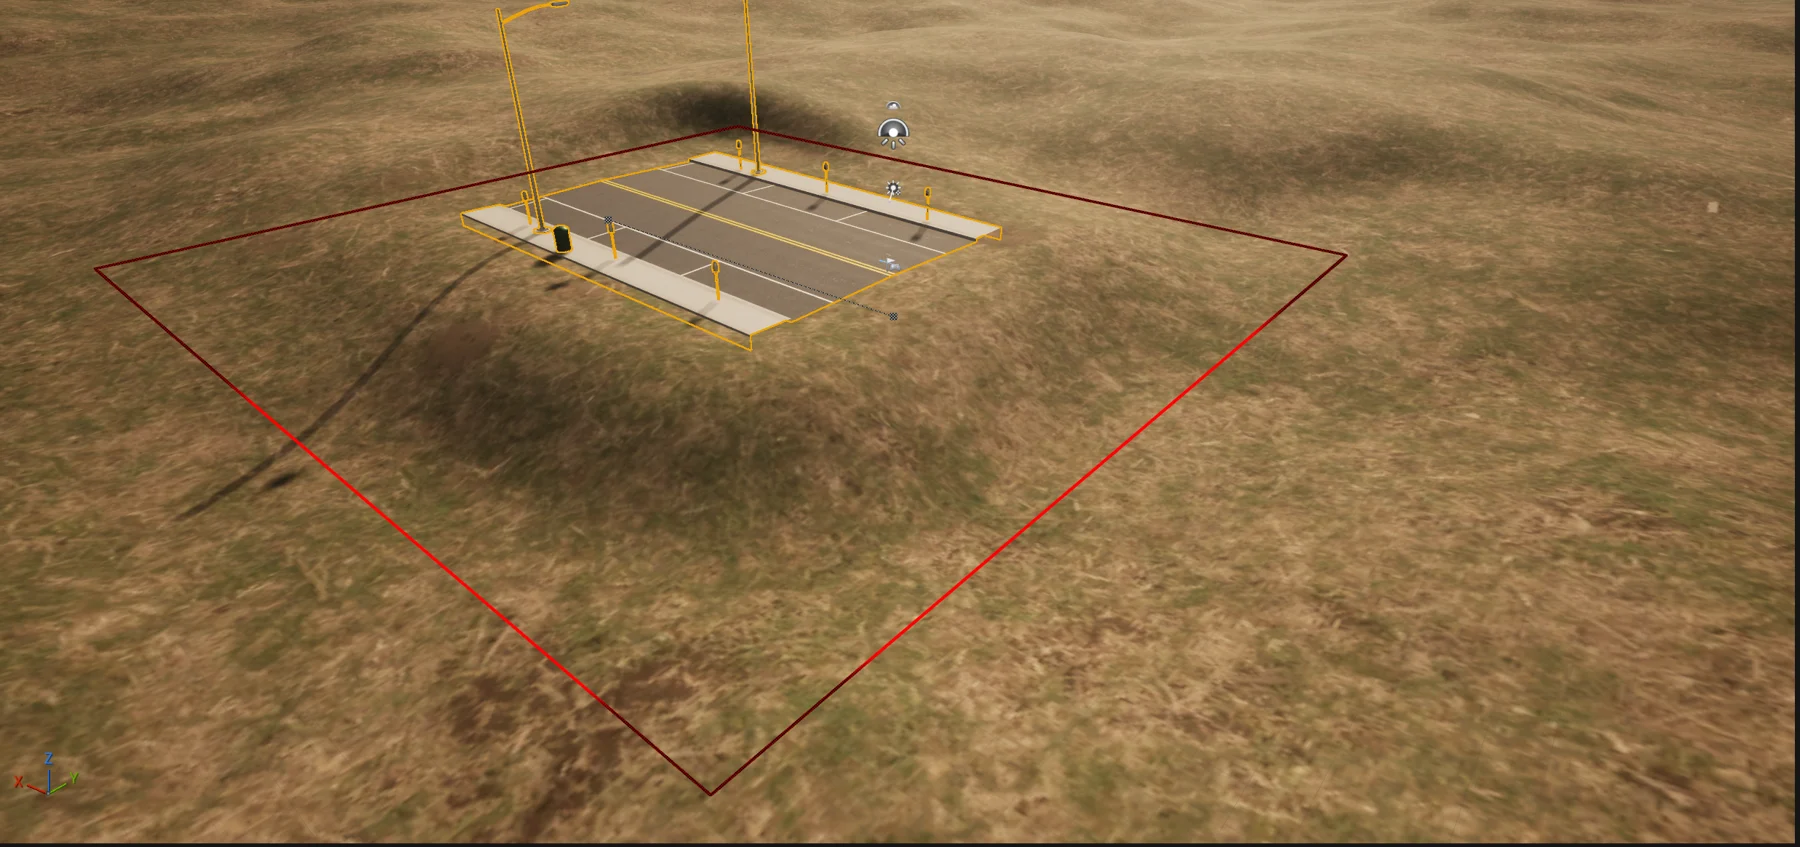
- The list shows every road type and the roundabout, then guardrails, barriers and noise walls. Drag one into the viewport and drop it on the ground. Every Exaro plugin you have installed lists its tools in this one tab.
You can also drag a style asset straight from the Content Browser (Exaro Road & Street Builder Content/Styles, files named DA_RoadStyle_…).
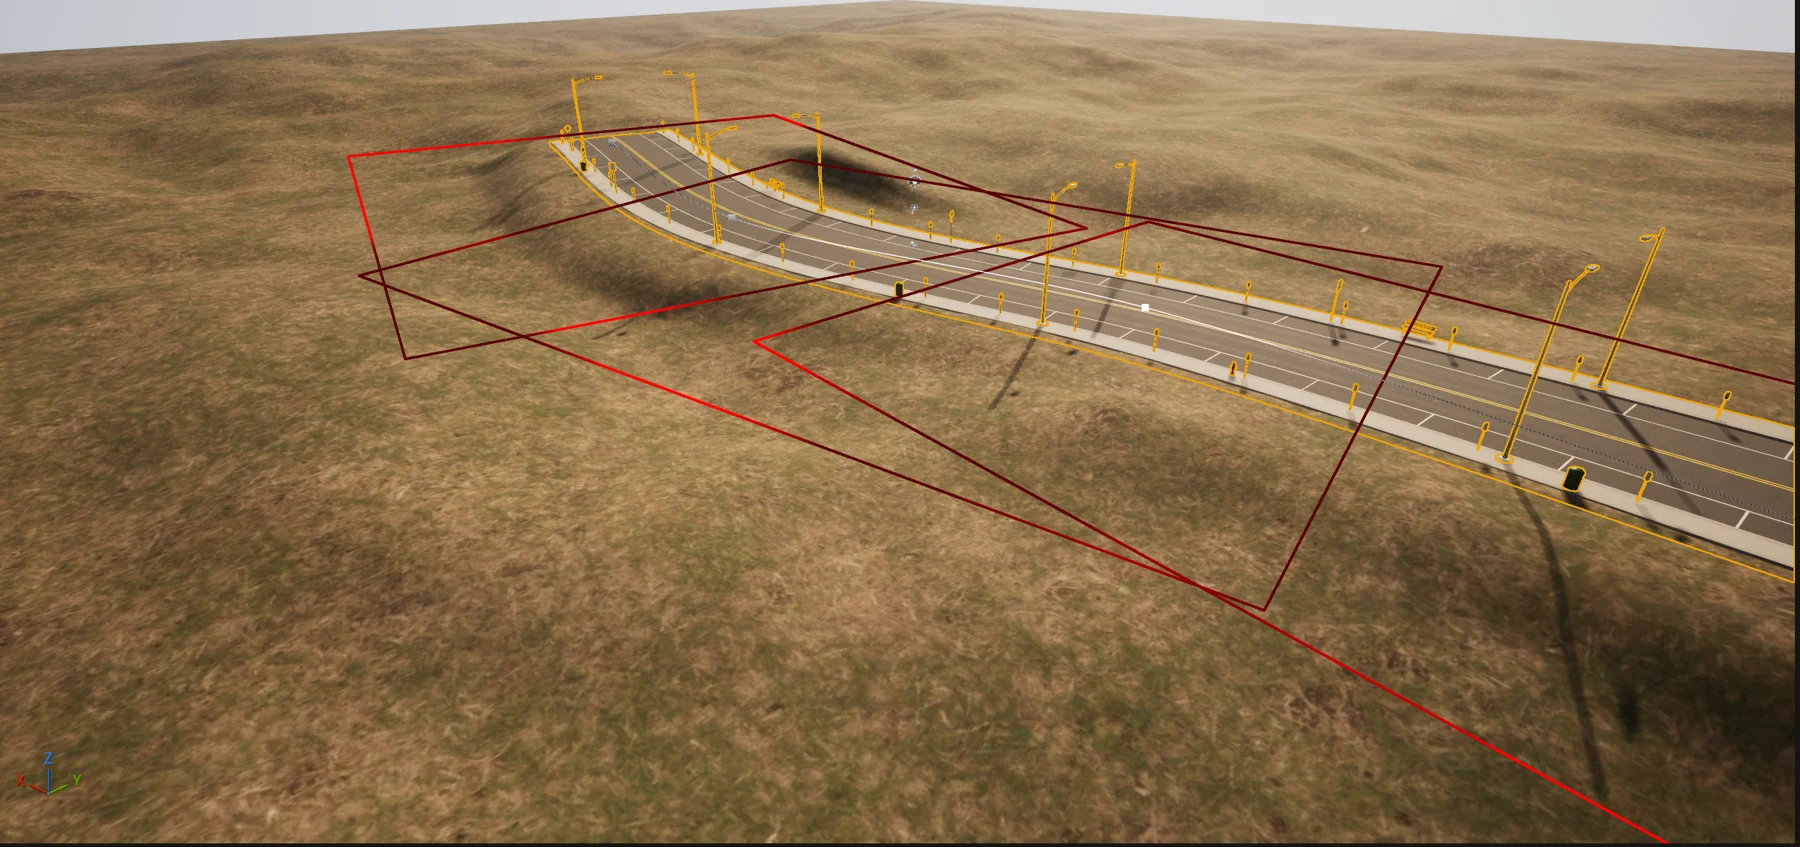
3. Shape it with the spline
With the road selected:
- Move a point: click a spline point and drag the move gizmo.
- Add a point: select the end point, hold Alt and drag it. A new point follows your mouse.
- Insert a point mid-road: right-click the spline and choose Add Spline Point Here.
- Remove a point: select it and press Delete.
- Smooth All Points and Straighten All Points in the Road section tidy every point at once.
Points drop onto the ground as you drag them across it, so a road follows hills without any extra work. To raise or lower a point on purpose (for an overpass, say), move it only up or down: a height set that way is kept. Points on a bridge or in a tunnel are never dropped. To place every point by hand, untick Points On Ground in the Road section's advanced options.
The road rebuilds as you drag. Only the stretches you changed are rebuilt, so long roads stay quick. Curbs, lights, signs and furniture follow the road; the landscape is graded to meet it.
The settings you will use most are at the top of the Details panel:
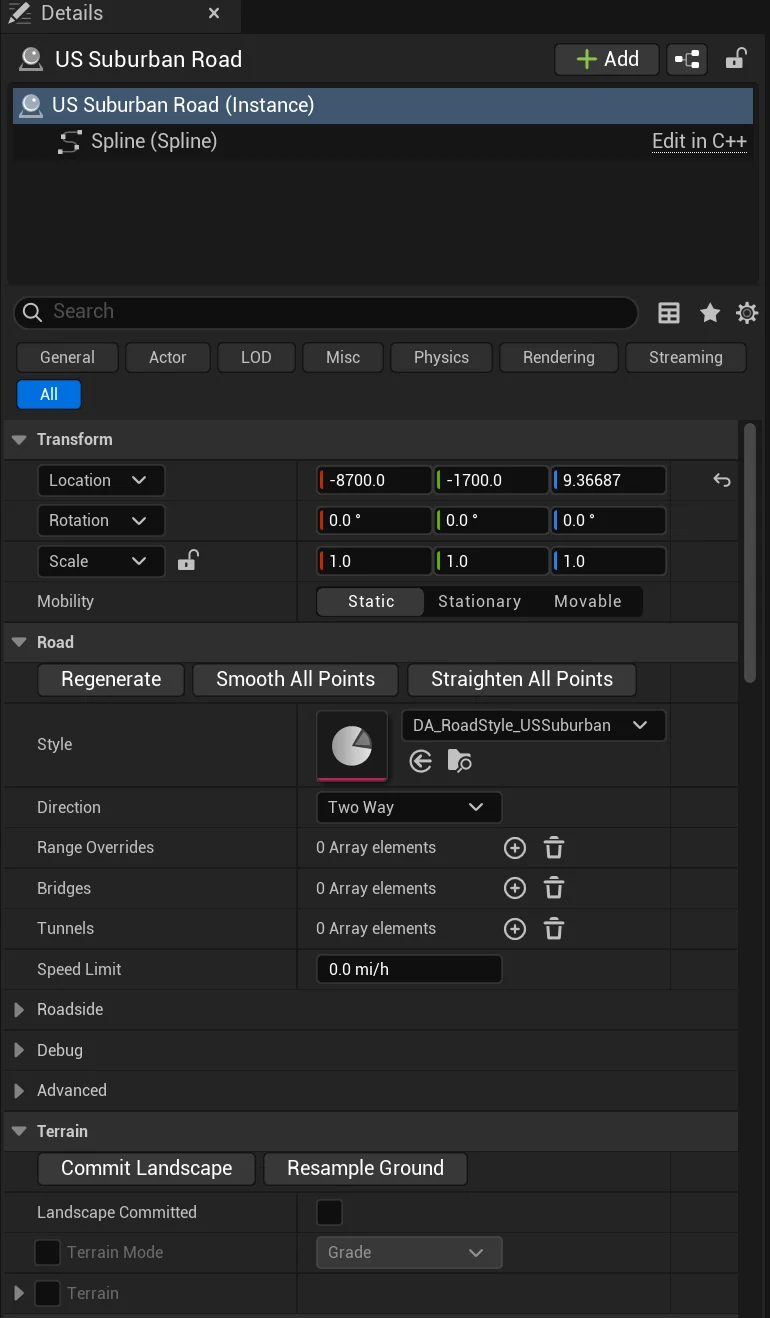
| Setting | What it does |
|---|---|
| Style | The road type. Swap it at any time and the same spline becomes a highway or a dirt track. |
| Direction | Two way, or one way in either direction. Markings and signs follow. |
| Range Overrides | Change part of the road over a stretch: remove a sidewalk, widen a shoulder, change a material, end a lane. |
| Bridges, Tunnels | Stretches of the road carried on a bridge or through a tunnel (sections 7 and 8). |
| Speed Limit | In mph. 0 uses the style's posted speed (US Suburban is 25 mph, Highway 65 mph). Any other value overrides it, and the speed limit signs show the nearest posted speed. |
Joining two roads
Drag a road's end onto another road's end (within about 4 m) and let go. If both roads have the same style and settings, they become one road, and any bridges, tunnels and overrides on either are carried over to the right place on it. If the styles differ, the ends snap together and the road you dropped fits itself to the other over the last 15 m: curbs and sidewalks the other road lacks end, its lanes and shoulders or parking widen or narrow to meet the other road's, and both meet the ground at the same height. A road that ends on the side of another road makes a junction instead (next section). To place an end freely, untick Join Ends in the Road section's advanced options.
4. Junctions
Draw a second road across or into the first. The junction is found and built for you: curb returns, crosswalks, curb ramps with tactile strips, stop bars, STOP signs and street name signs. Move either road and the junction follows.
A crossing appears in the Outliner as two junction actors, one for each side road. Select either to change the crossing: Control, crosswalks, Corner Radius and Ramp Width are shared, so changing one half changes both.
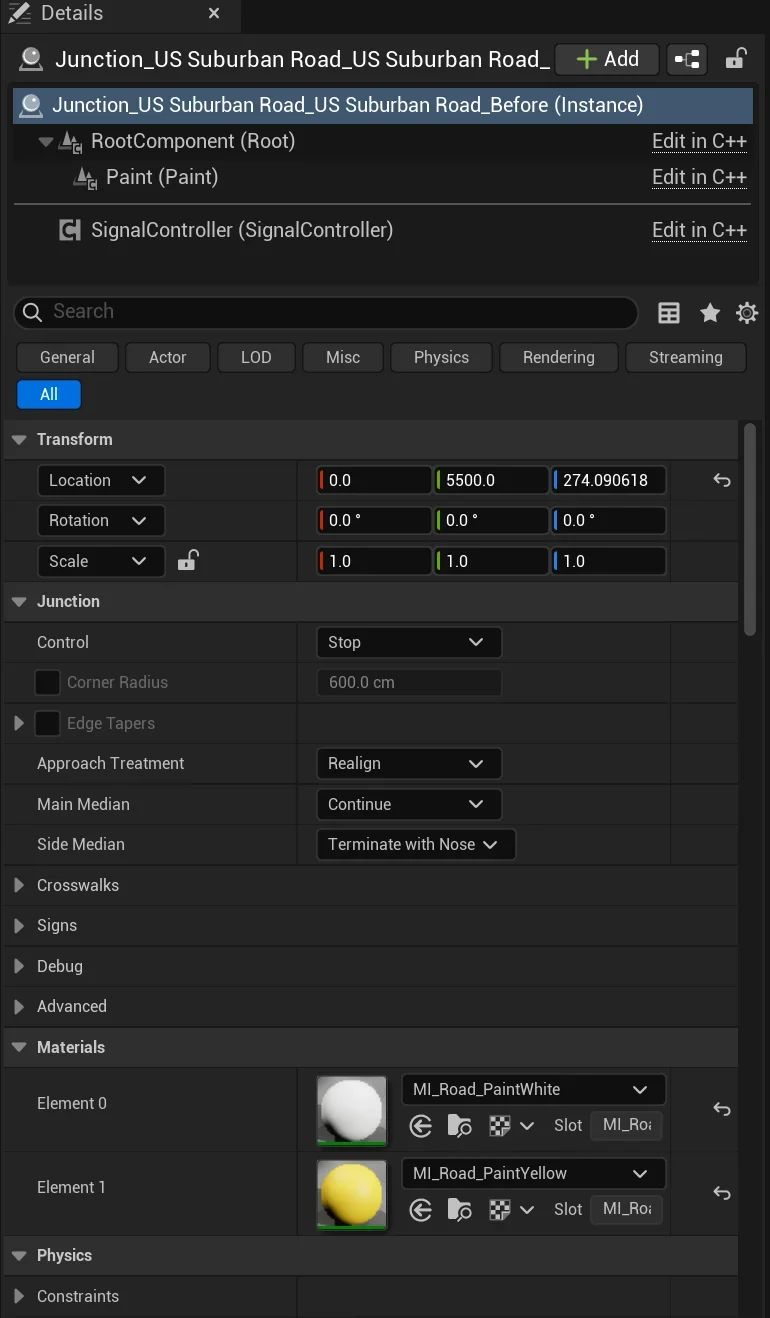
| Setting | What it does |
|---|---|
| Control | Stop (STOP signs and stop bars on the side road), Yield, Uncontrolled, or Signal: traffic signals over every approach. |
| Corner Radius | Tick the box to set your own curb return radius instead of the style's. |
| Edge Tapers | Tick to set how quickly shoulders and verges narrow into the junction. |
| Approach Treatment | Realign bends a road that arrives at a sharp angle so it meets the other road square. |
| Main Median, Side Median | On divided roads: carry the median through, or end it with a nose before the junction. |
| Crosswalks | Crosswalks with curb ramps across the side road, the main road, or both. Ramp Width is here. |
Traffic signals
Set Control to Signal. Mast-arm signals go up over every approach and stop bars are painted on the main road too.
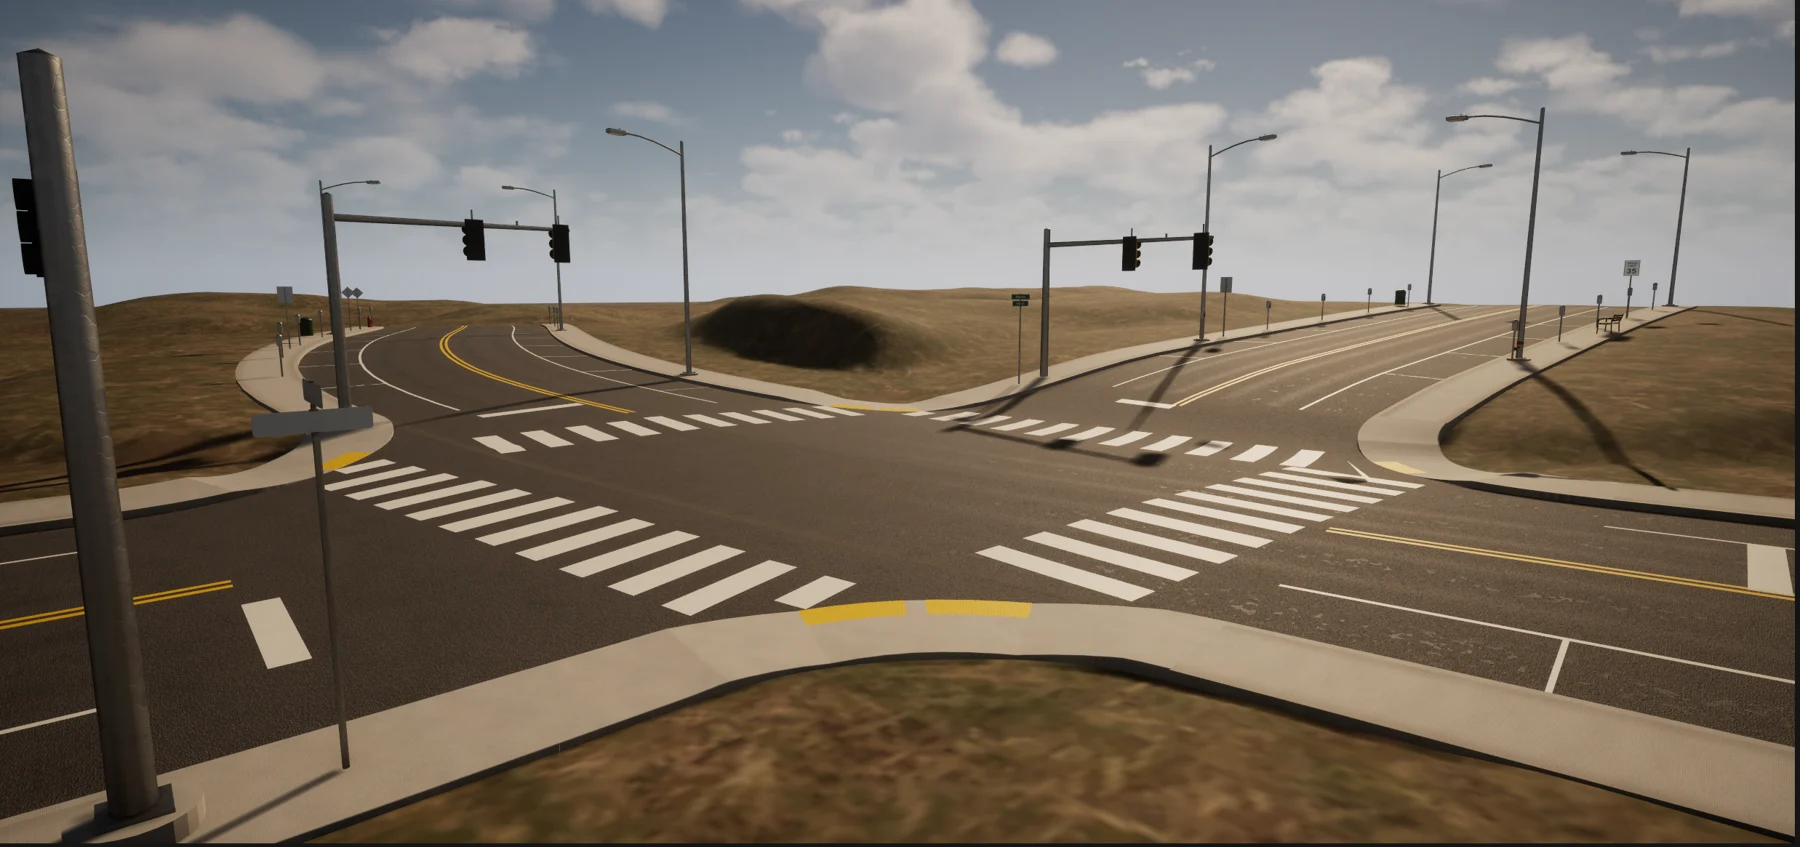
The timing is on the junction's Signal Controller component: Main Green, Side Green, Yellow and All Red in seconds, and an Offset to stagger neighbouring junctions. In play the lights cycle main green, yellow, all red, side green, yellow, all red. Blueprint can read the state with GetState and GetTimeToChange.
5. Roundabouts
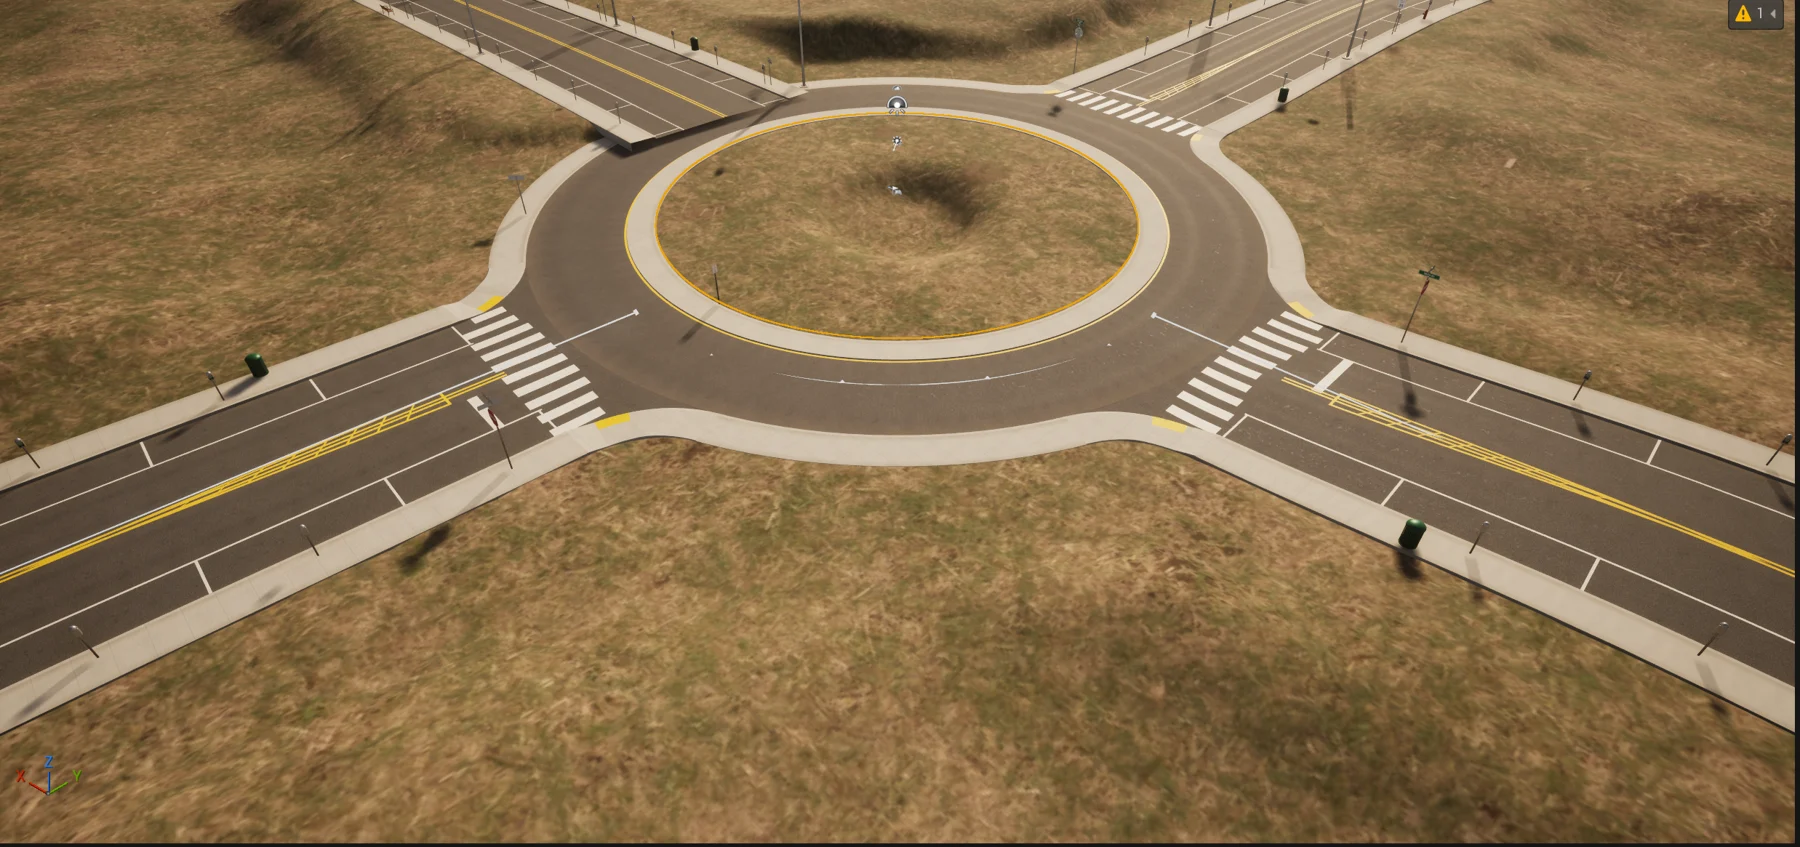
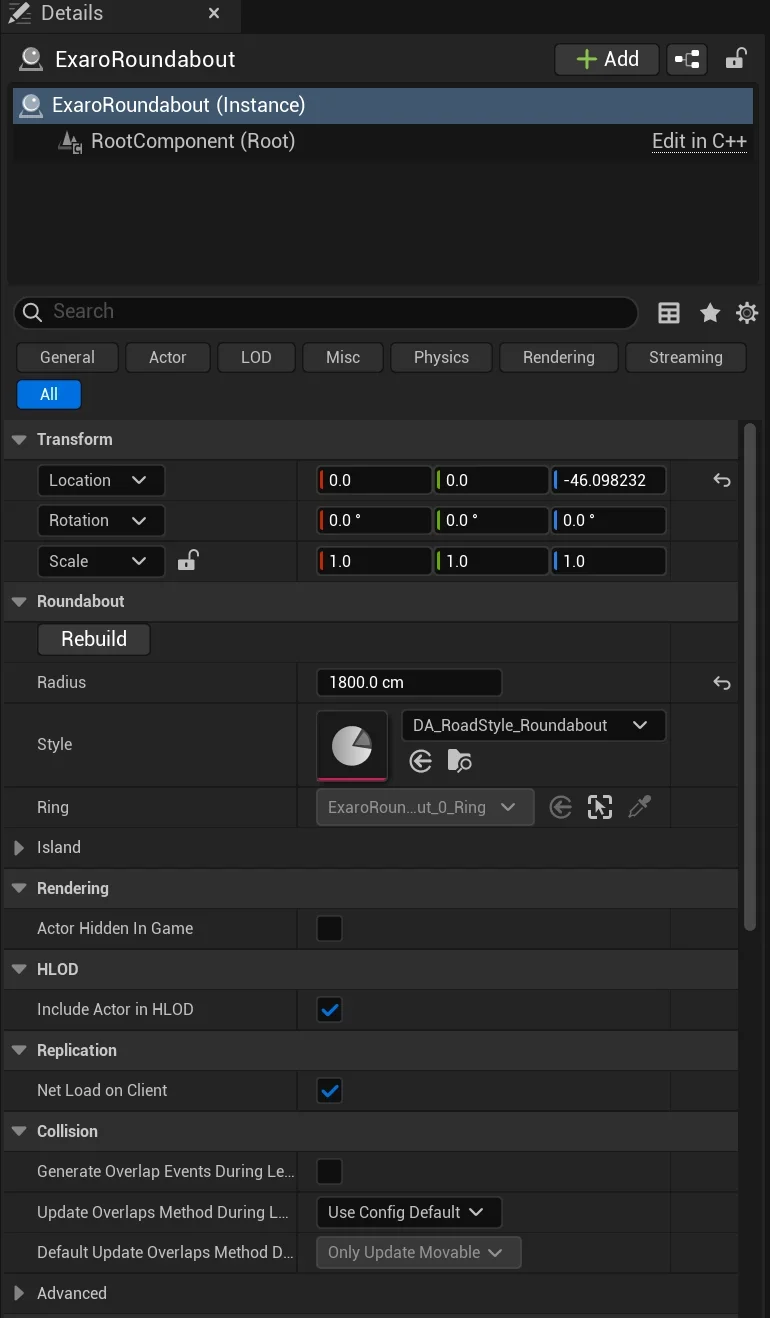
- Drag Exaro Roundabout from Place Actors → Exaro into the level.
- Set its Radius (to the middle of the ring) and its Style:
Roundabout(one lane) orRoundabout Two-Lane. - Draw roads so they end on the ring. Each becomes an entry with a YIELD sign, a yield line and a painted splitter island.
- Click Rebuild after adding or moving roads.
6. Condition and wear
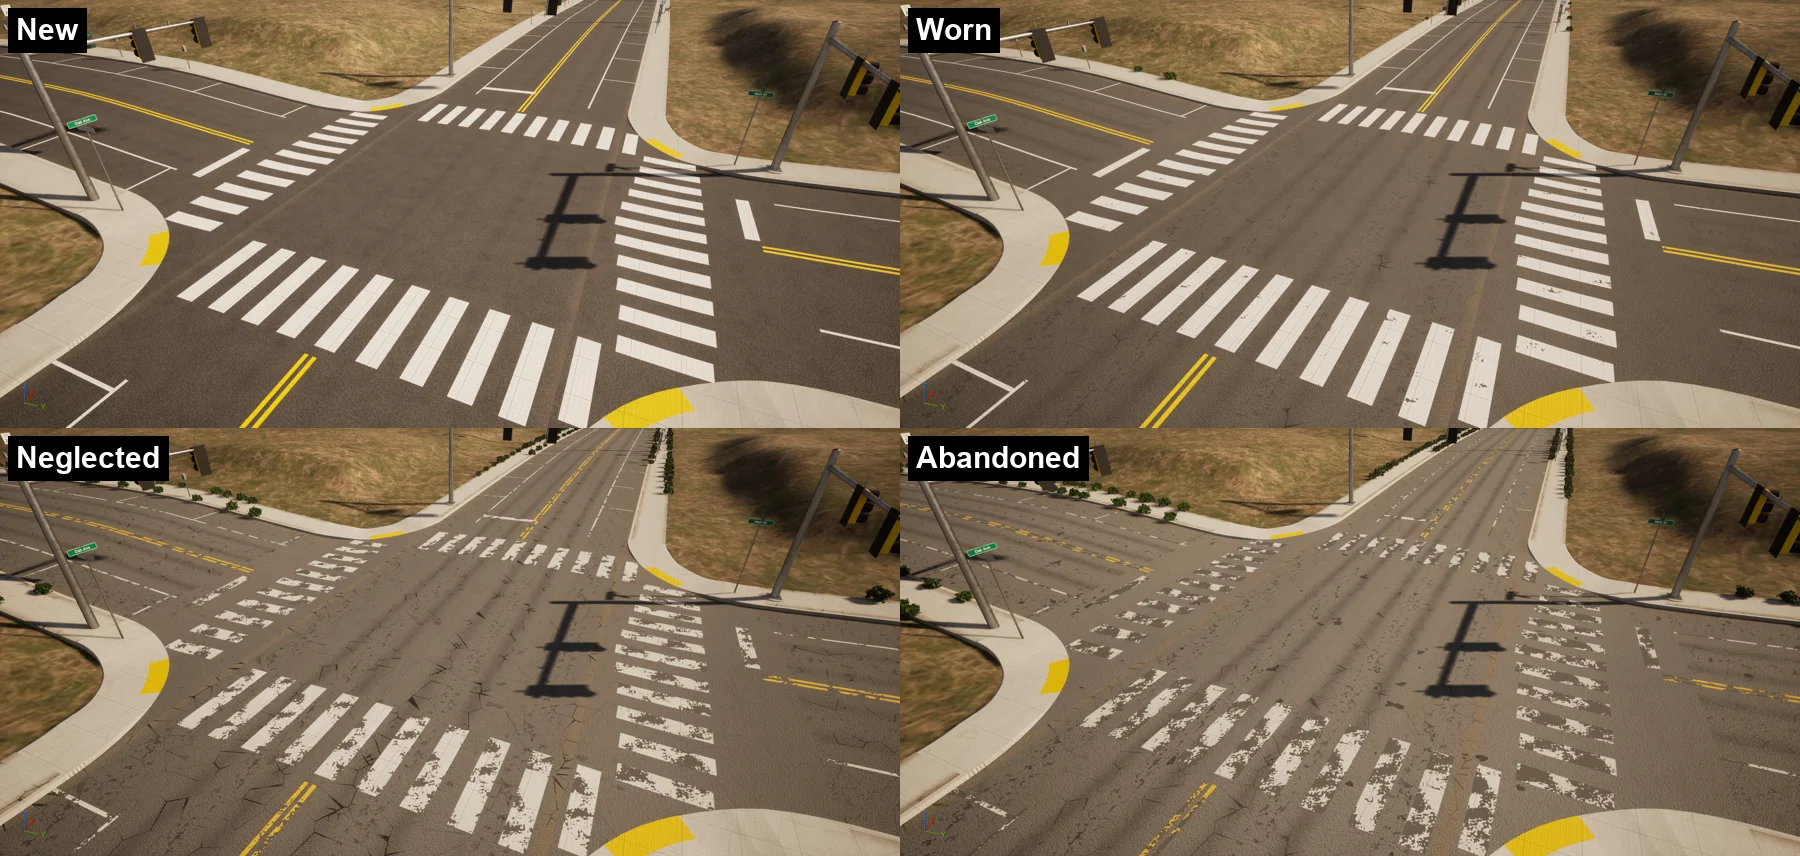
Condition Preset in the Appearance section ages the whole road in one step: New, Maintained, Worn, Aged, Neglected and Abandoned. Older roads get sealed cracks, repair patches, faded and chipped paint, potholes, weeds, litter, tipped bins, bent signs and broken lamps.
| Setting | What it does |
|---|---|
| Condition | Fine control between presets, 0 (new) to 1 (abandoned). |
| Marking Wear | How worn the painted lines are. Leave it at -1 to follow Condition, or set 0 to 1 yourself. |
| Wetness | 0 is dry. Raise it for wet asphalt and puddles after rain. |
| Seed, Randomize Seed | A different arrangement of cracks, wear and props. |
7. Bridges
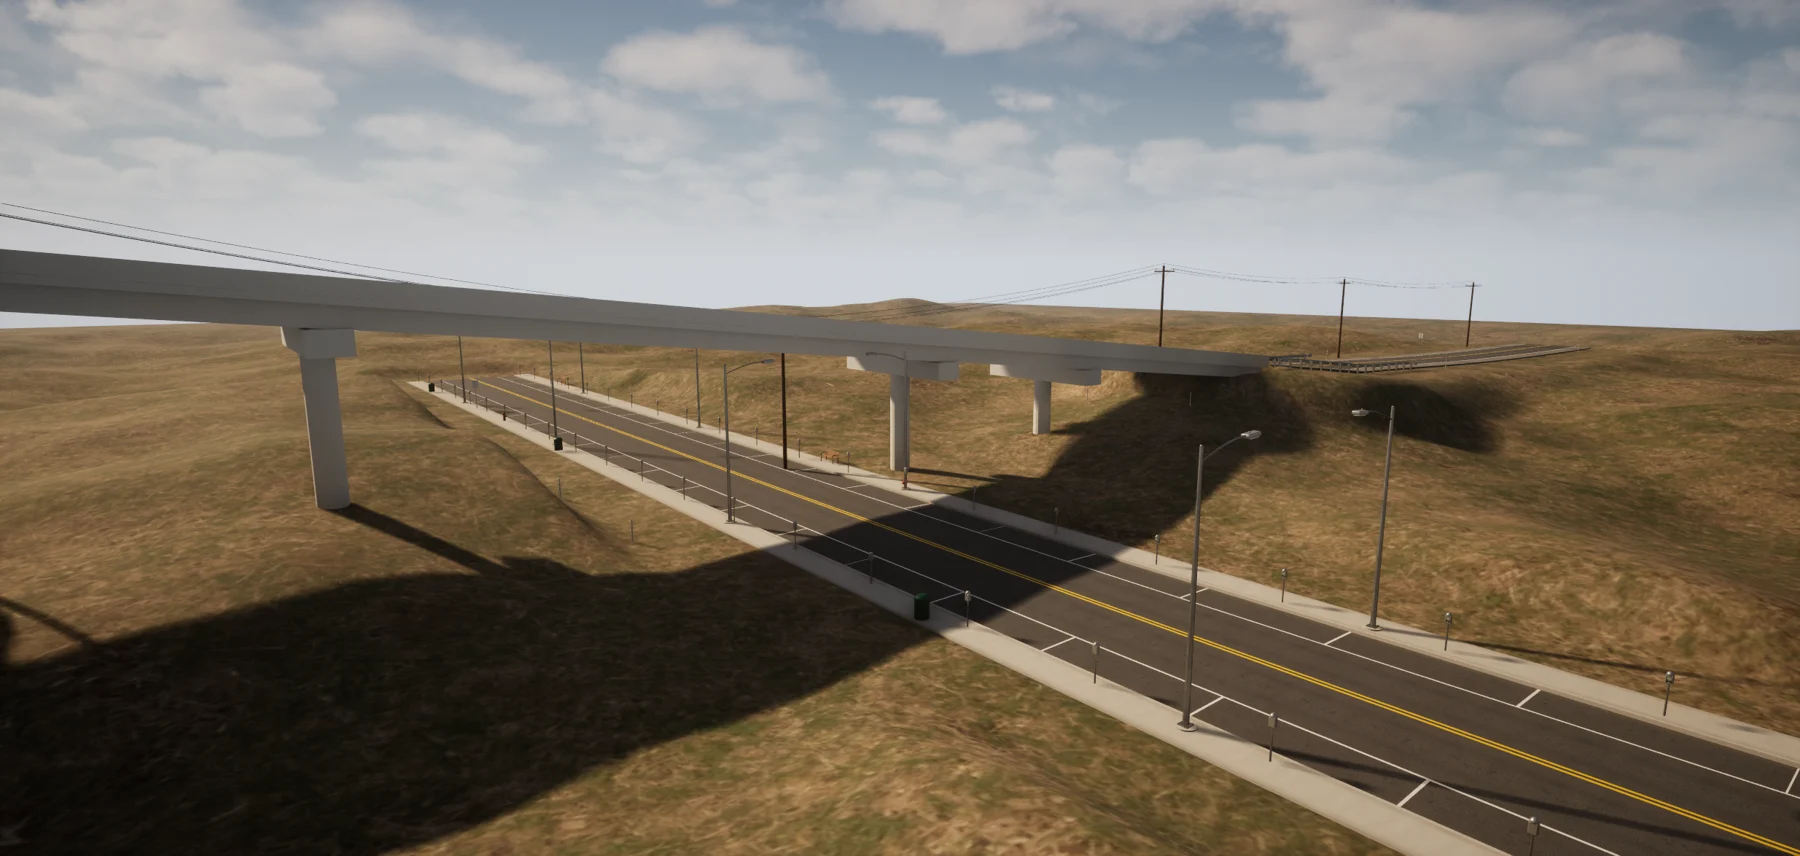
- Select the road. In the Road section, click + next to Bridges.
- Set Start Distance and End Distance: where the bridge starts and ends, in centimetres along the road from its first point.
- Pick Height. Span runs straight between the road's heights at each end, for crossing a valley. Spline uses your spline points' heights: raise points for an overpass.
- Rise lifts the whole bridge and its approaches ease up to it.
The bridge gets a concrete deck, barriers, piers down to the ground every Pier Spacing and an abutment wall at each end. Roadside furniture keeps off the bridge and its approaches. Guardrail on the approaches is bolted to the bridge's barriers through a steel transition; on roads with concrete barriers along the shoulders (Urban Freeway), the barriers meet the bridge's parapet and the median barrier carries on across the deck. The landscape under the bridge is left alone.
8. Tunnels
- Select the road. Click + next to Tunnels.
- Set Start Distance and End Distance as for a bridge.
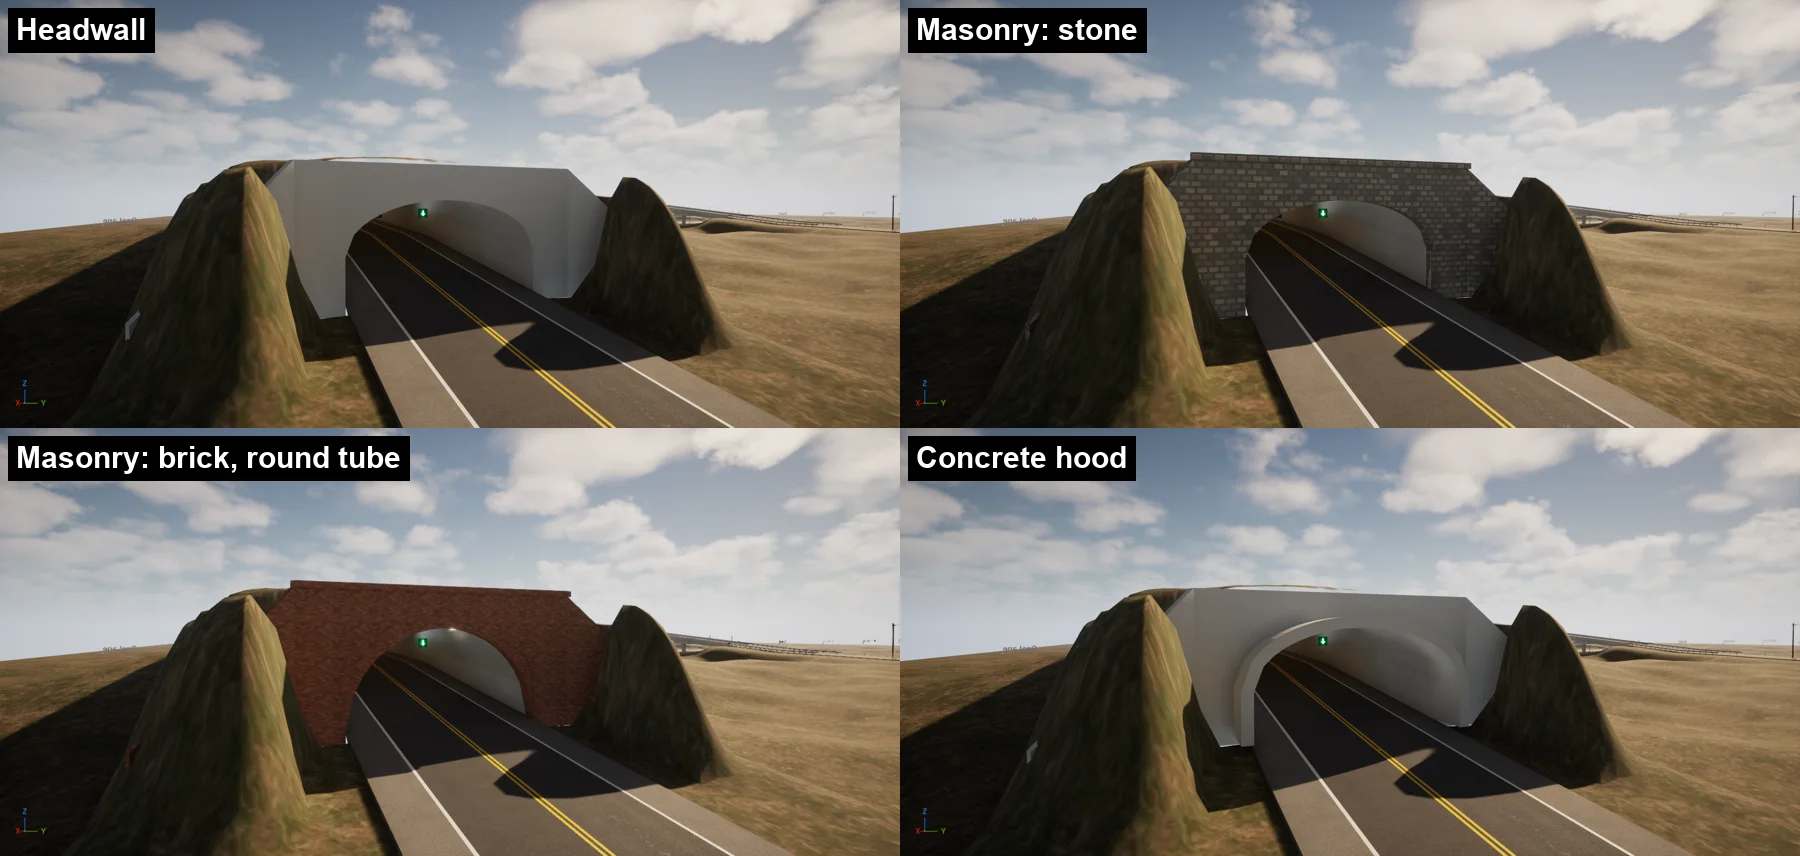
- Choose a Shape: Horseshoe (most road tunnels), Box (cut and cover) or Round.
- Choose a Portal: Headwall (plain concrete), Masonry (stone or brick with arch stones, pick which in Masonry) or Hood (the lining sticks out of the hillside).
Inside, Lights adds light strips along the ceiling (on by default) and Lane Signals adds a green arrow over each lane at each mouth. Clearance sets the height inside. Cover Depth is the earth kept over the tube: where the ground is lower than that, the landscape is raised over it.
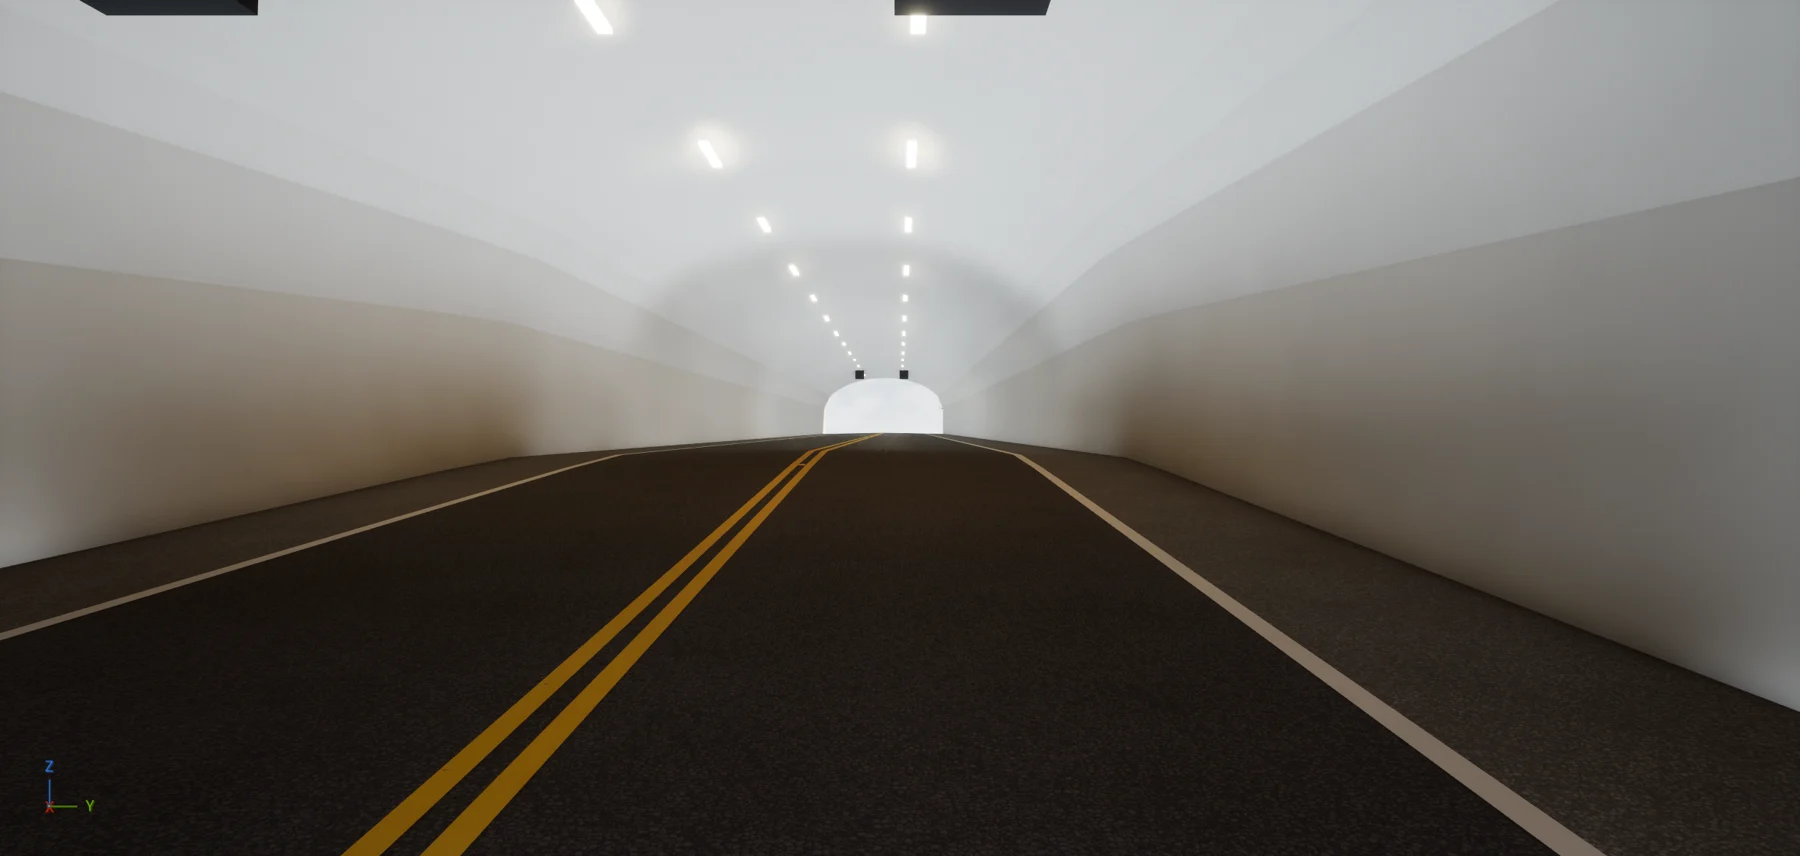
9. Street lights
Lamps are placed as meshes only. Nothing adds a light to your level unless you ask: lights cost performance and most projects light their own streets. To light the lamps, open the road's style asset and tick Roadside → Lights → Lit. Each lamp then gets one shadowless point light and a glowing lens. Intensity, colour, radius, shadows and a maximum light count are next to it.
10. Bake when you are done
Roads stay editable until you bake. Bake Network in the Output section of any road replaces the whole network with static meshes: road and junction surfaces merged by material, props as instanced meshes, collision kept. Unbake Network brings the live roads back.
You do not have to bake: live roads work in packaged games too. Baking removes the construction step and lets you edit the result as ordinary meshes. Traffic signals keep working after a bake: each signal junction becomes a small Signals_ actor with its own controller, on the same timing and clock.
Traffic and AI
Build AI Lanes (ZoneGraph) in the Output section makes ZoneGraph lanes for the whole network, including the turns through every junction, so Mass traffic and crowds can drive it. Press it again after editing roads. AI traffic itself is a separate add-on.
From Blueprint or Python, GetLaneGraph returns every drivable lane with its width, speed and links, and FindNearestLane and GetLanePoint let a vehicle find and follow one.
The road types
| Style | What you get |
|---|---|
| US Suburban | Two lanes, parking both sides, curbs, sidewalks, lamps, benches, bins, hydrants. |
| US Downtown | Four lanes, parking, wide sidewalks, meters, street trees. |
| Rural Two-Lane | Two lanes, paved shoulders, grass verges, guardrails on bends, utility poles. |
| Divided Boulevard | Two lanes each way either side of a raised grass median with trees. |
| Highway, Urban Freeway | Two lanes each way, shoulders, median barrier or grass median, guardrails. |
| Ramp | A one-way slip road for joining and leaving highways. |
| Industrial | Wide concrete lanes, no parking. |
| Cobblestone Street, Brick Street | Paved old-town streets. |
| Gravel Road, Dirt Track | Unpaved rural roads, no markings. |
| Alley | One shared lane, no sidewalks. |
| Roundabout, Roundabout Two-Lane | The ring styles used by Exaro Roundabout. |
Make your own style
A style is a data asset: a Profile (the cross-section, layer by layer from the centre out, each with a kind, width, height and material), plus marking rules, roadside rules and terrain settings. The quickest way is to duplicate one of ours (right-click → Duplicate), move it into your own folder and change it. Set Style Name and it appears in Place Actors → Exaro. Every lamp, sign, bench and tree can be swapped for your own mesh.
Troubleshooting
The Exaro tab is missing or empty
It sits just under Basic in Place Actors (on a short panel, look under More). If the list is empty, close and reopen Place Actors once the editor has finished loading.
The road sits in a trench or floats above the ground
A point you moved only up or down keeps that height. Drag it sideways a little and it drops back onto the ground. Also check Terrain Mode in the Terrain section. Grade shapes the ground to the road. When the layout is final, click Commit Landscape to write the grading into the landscape itself.
A tunnel mouth is blocked by the hill
Your landscape needs Edit Layers and a Visibility Mask in its material (see the note in section 8).
The junction did not appear
The two roads must actually meet or cross. Drag one road's end point onto the other road, or across it.
I can't see the plugin's content
In the Content Browser, open Settings and tick Show Plugin Content.
Need help?
Email [email protected] with your engine version and a screenshot.