Fence & Wall Builder
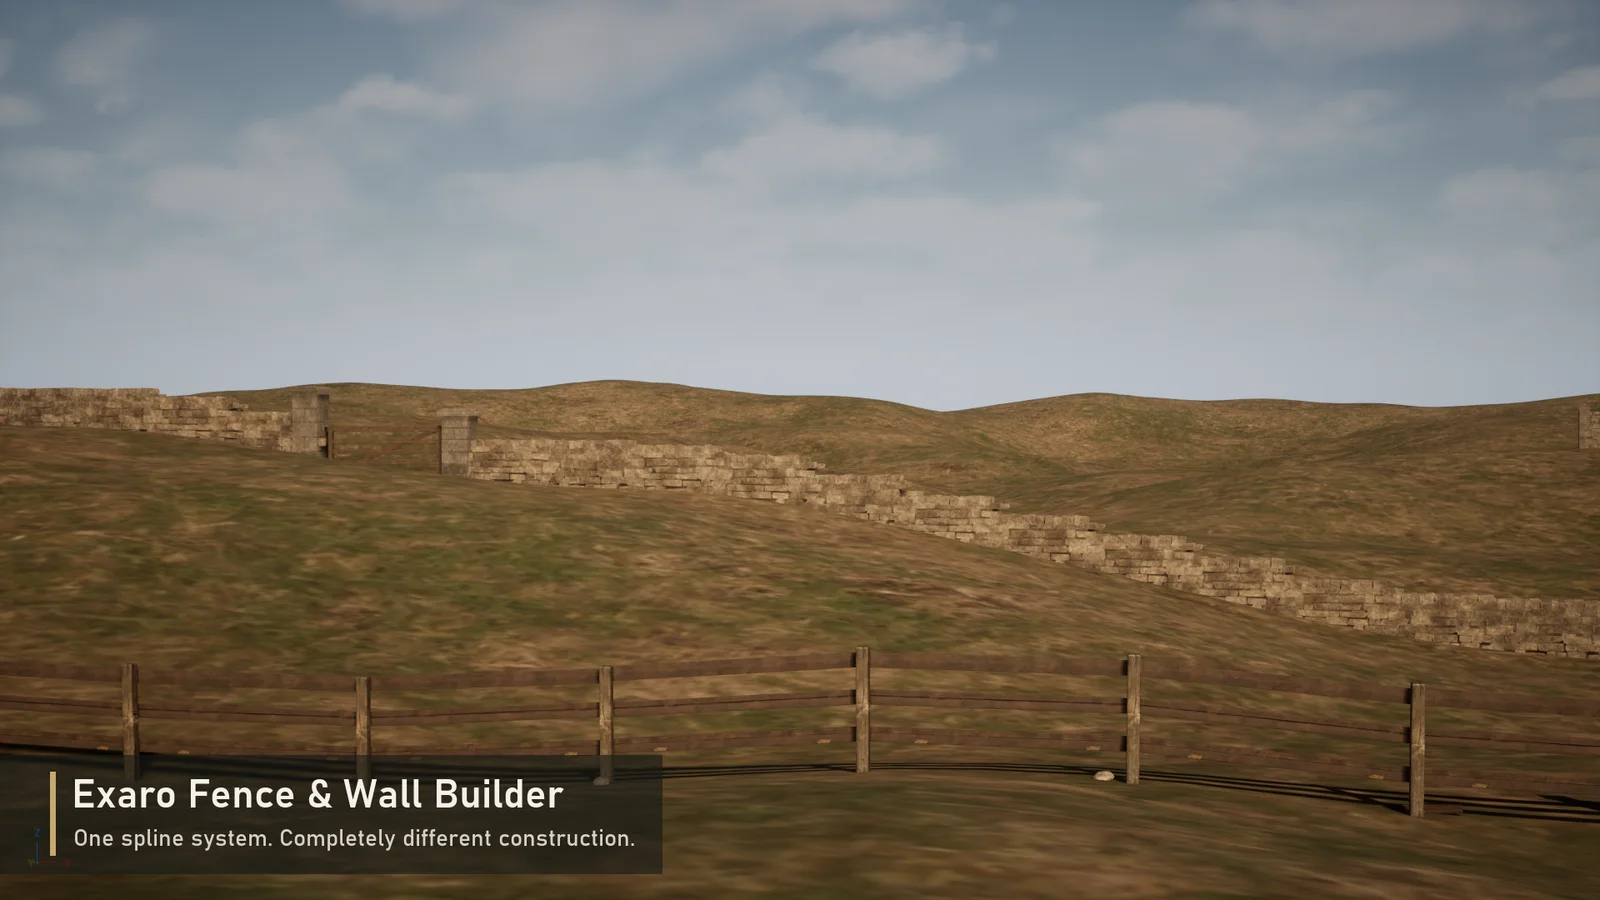
Draw a spline and get a finished fence or wall that sits on your terrain. Sixteen styles with gates, damage, colour variants and low-poly versions, for Unreal Engine 5.6, 5.7 and 5.8.
1. Install and enable
- In the Epic Games Launcher, open Fab Library, find Exaro Fence & Wall Builder and click Install to Engine for your engine version (5.6, 5.7 or 5.8).
- Open your project. Go to Edit → Plugins, type
Fencein the search box and tick Exaro Fence & Wall Builder. - Click Restart Now.
The default styles use Nanite meshes. Nanite needs Shader Model 6: check Project Settings → Platforms → Windows → D3D12 Targeted Shader Formats includes SM6 (new projects have it already). If you cannot use Nanite, pick the _LowPoly styles instead.
To see every feature at once, open the showcase map: in the Content Browser, click Settings → Show Plugin Content, then open ExaroFenceWall Content/Showcase/L_FenceWallShowcase.
2. Place a fence
- Open Window → Place Actors if the panel is not already showing.
- Click More at the bottom of the panel's left column, then Exaro Structures (2).
- The list shows every style (1). Drag one into the viewport and drop it on the ground.
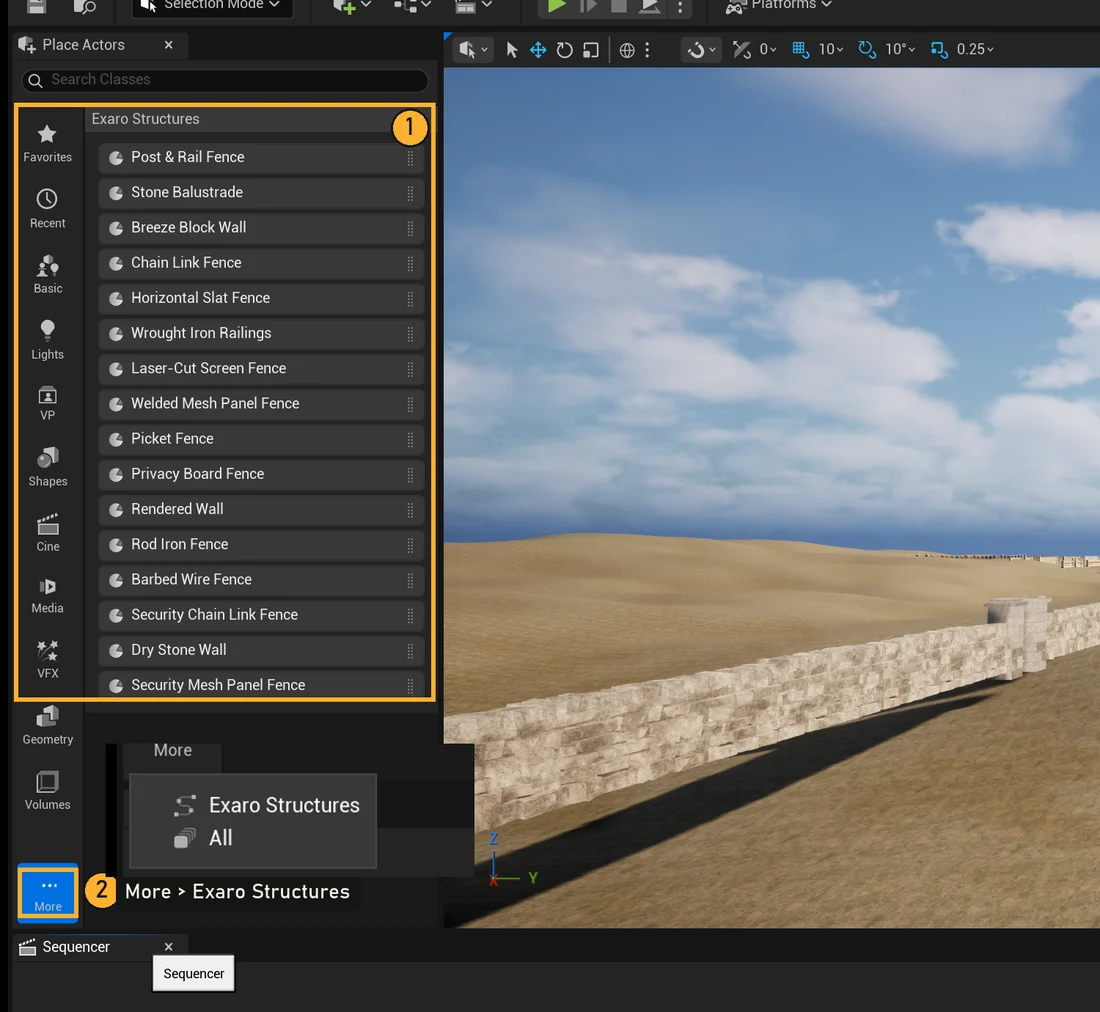
You can also drag a style asset straight from the Content Browser (ExaroFenceWall Content/Styles, files named DA_Style_…). Dropping a style asset places a structure that uses it.
3. Shape it with the spline
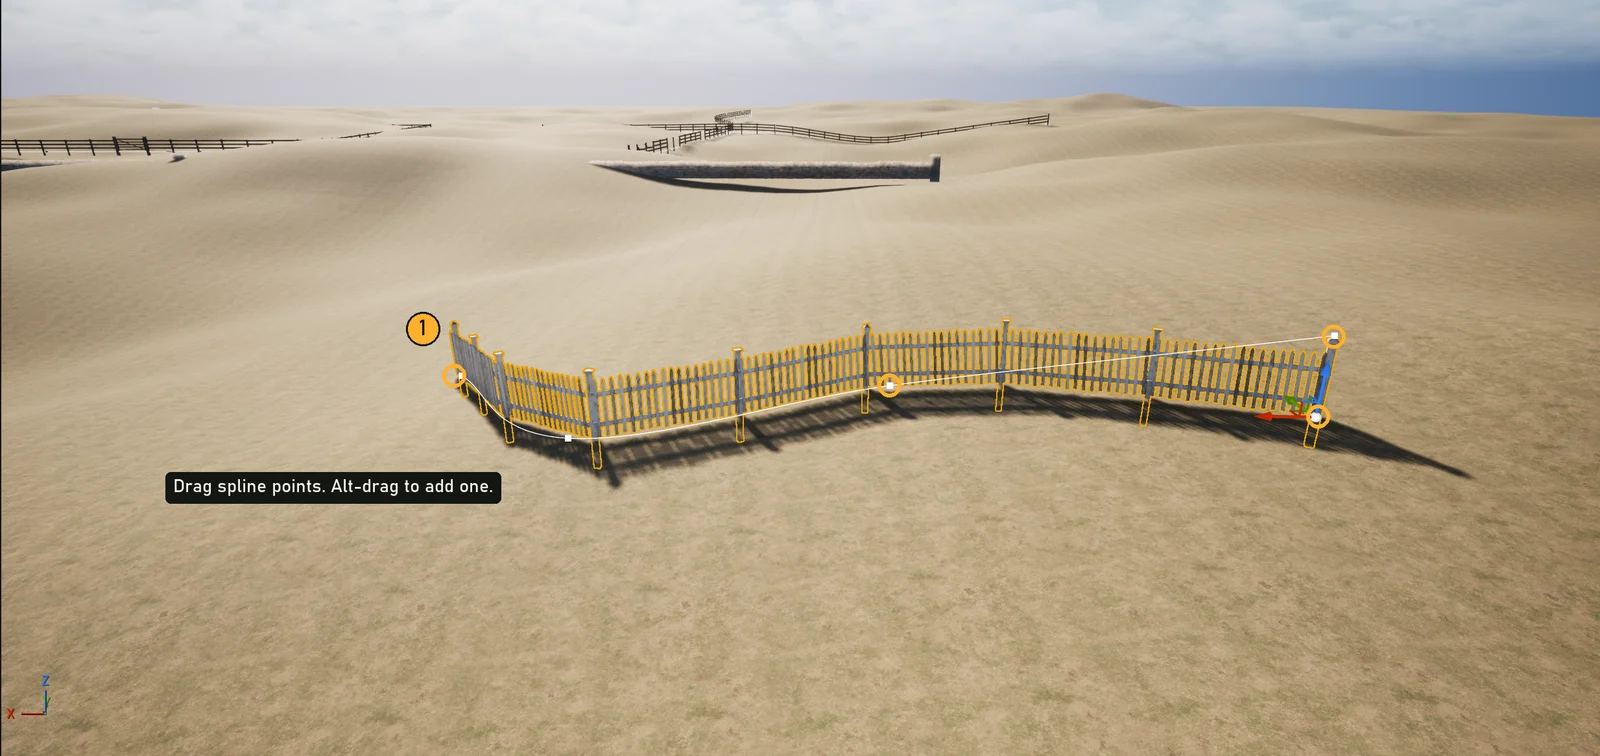
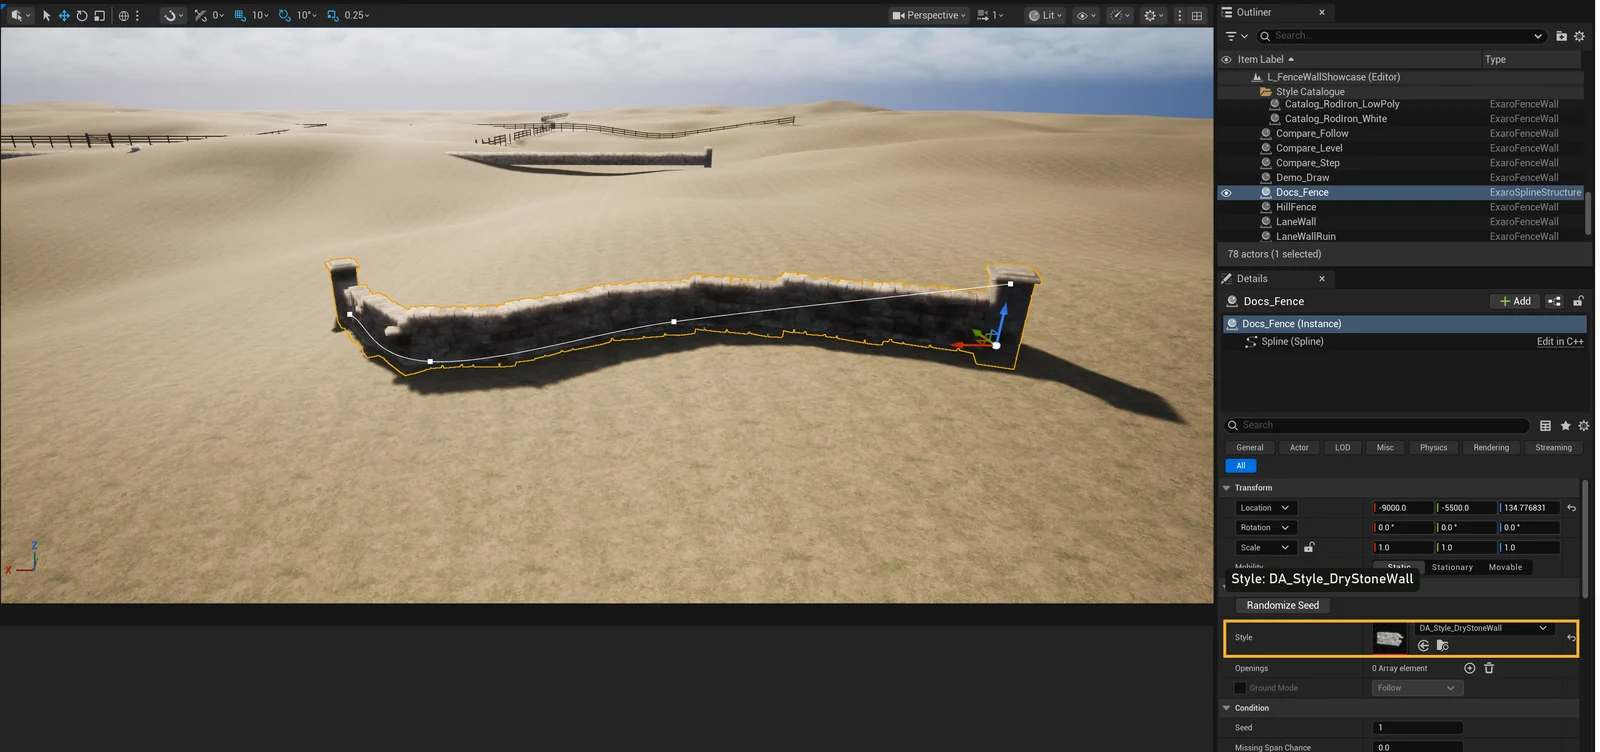
A new structure is a short straight run with two points. With the structure selected:
- Move a point: click a spline point (the white dots) and drag the move gizmo.
- Add a point: select a point, hold Alt and drag it. A new point follows your mouse.
- Insert a point mid-run: right-click the spline line and choose Add Spline Point Here.
- Sharp corner: right-click a point → Spline Point Type → Linear. Use Curve for a smooth bend.
- Remove a point: select it and press Delete.
The fence rebuilds as you drag, and posts and panels settle onto whatever ground is underneath.
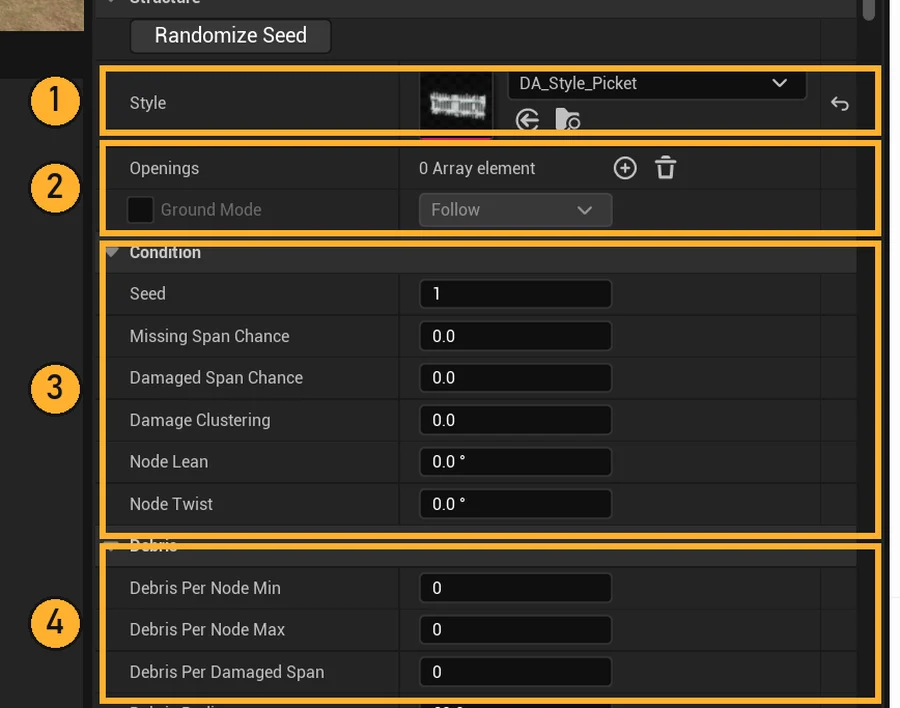
Every setting you need is at the top of the Details panel when the structure is selected:
4. Change the look
In the Details panel, open the Style drop-down and pick another style. The same spline becomes a stone wall, a chain-link fence or a balustrade. Nothing else needs changing.
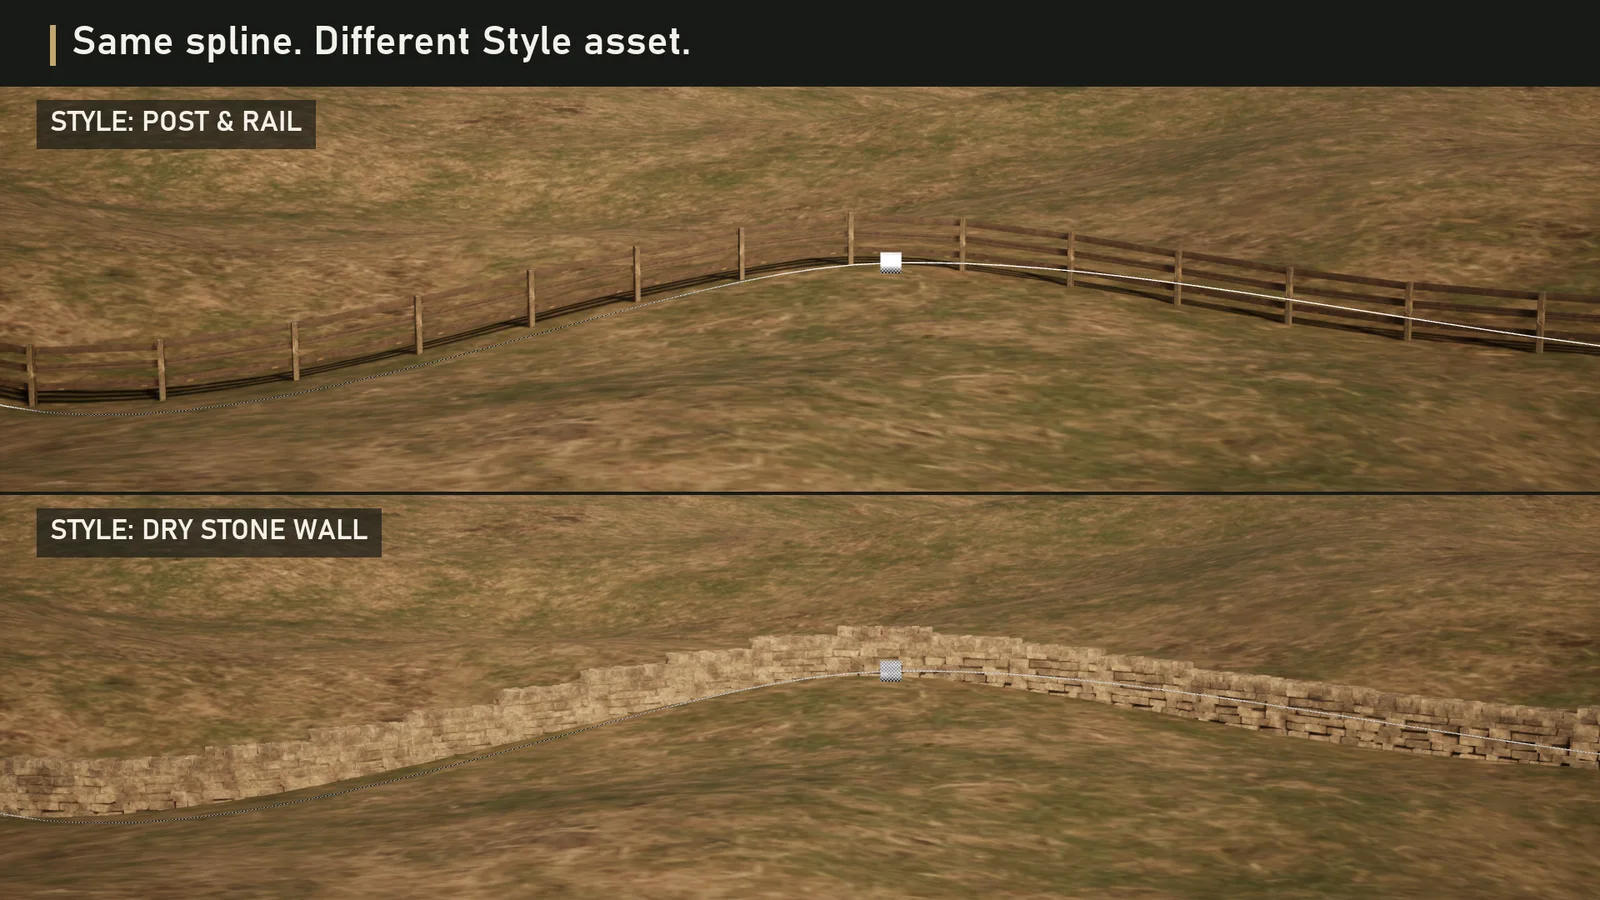
Colour variants are separate styles with the colour in the name, for example DA_Style_Picket_Sage or DA_Style_RodIron_Bronze.
5. Add a gate or gap
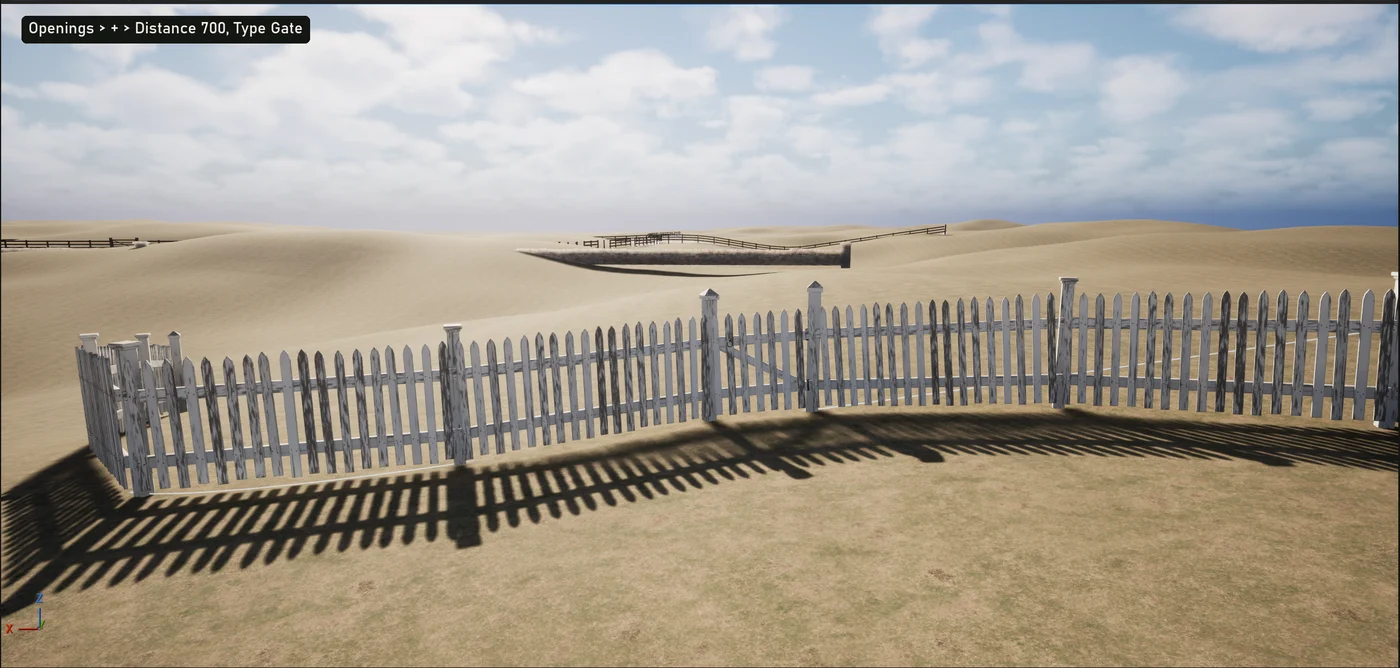
- In Openings, click the + button. A new entry appears.
- Expand it and set Distance: how far along the spline the opening's centre is, in centimetres from the first point. 700 means 7 m in.
- Set Type to an opening the style offers. Fences have
Gate(Rod Iron hasWalk GateandDrive Gate, Barbed Wire hasWire Gate); walls haveGatewayorGap. Leave it empty to use the style's first type. The Style asset lists them under Opening Types. - Leave Width at 0 to use the type's default width, or set your own.
Spans either side of the opening are re-spaced so you never get a sliver panel next to a gate.
6. Weather and damage
Everything under Condition is optional. Start at zero and raise values until it looks right.
| Setting | What it does | Try |
|---|---|---|
| Seed | Picks a different random layout of damage and variation. Randomize Seed does it for you. | any |
| Damaged Span Chance | Share of spans that are broken. | 0.2 to 0.5 |
| Missing Span Chance | Share of spans that are gone entirely. | 0.05 to 0.15 |
| Damage Clustering | 0 scatters damage. Higher values group it into breaches that run on along the fence. | 0.5 |
| Node Lean, Node Twist | Maximum random lean and twist of posts, in degrees. | 2 to 6 |
The Debris section adds rubble and fallen pieces at damaged spans and around posts.
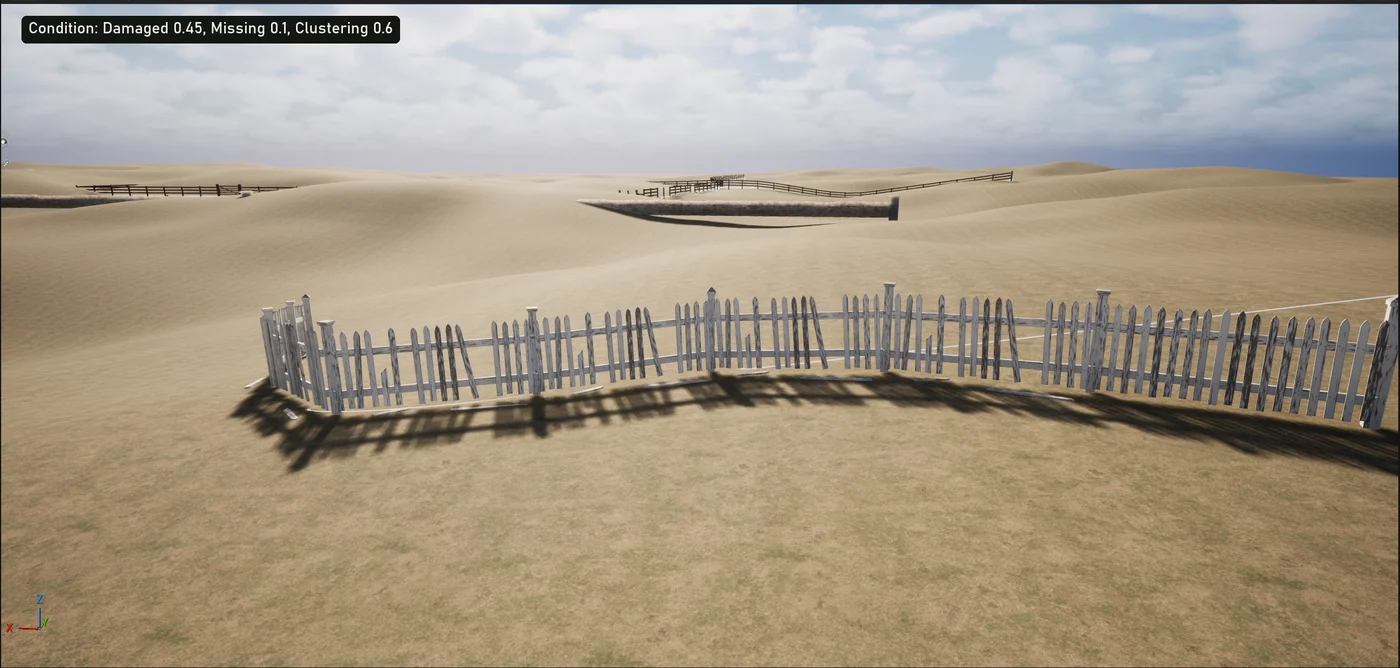
Everything random comes from the seed and is tied to its place on the spline, so editing one end never reshuffles the other.
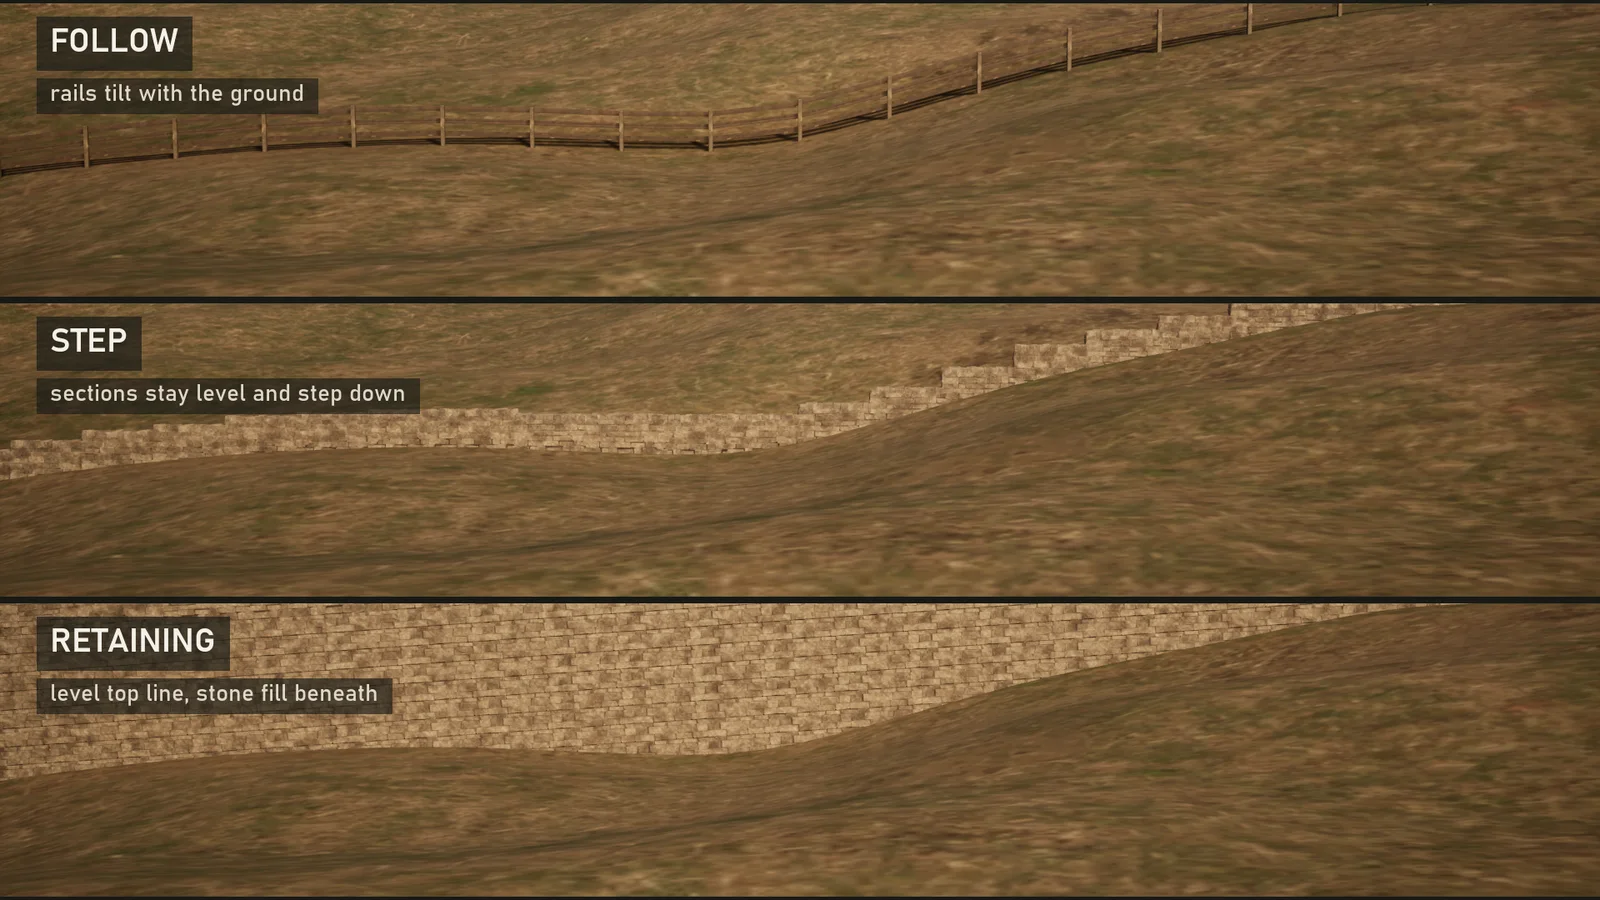
7. Slopes: ground modes
Each style has a sensible ground mode. To override it for one structure, tick the box next to Ground Mode in the Structure section and pick a mode.
- Follow: spans tilt with the slope. Rail fences, wire, chain link.
- Step: spans stay level and step down the slope, with footings filling the gap underneath. Walls, board and panel fences.
- Level: the top follows the spline's own height and footings fill down to the ground. Retaining walls and terraces: raise the spline points to the height you want.
8. Bake when you are done
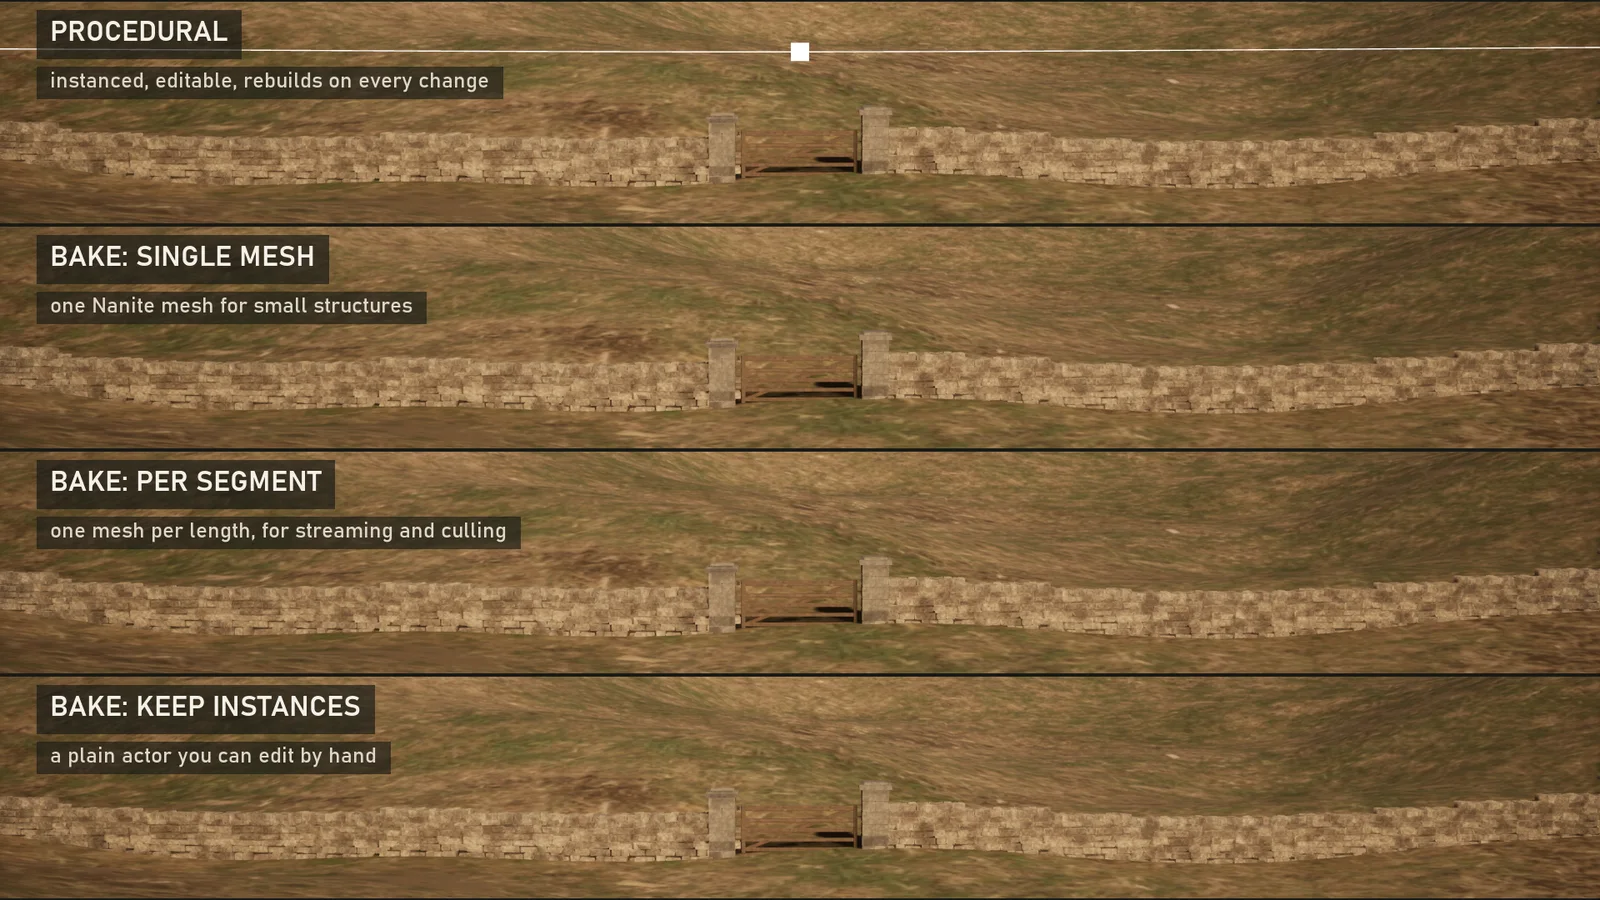
A structure stays editable until you bake it. Baking turns it into ordinary static mesh actors and saves the meshes to /Game/ExaroBaked, so your project keeps working even without the plugin.
- Pick a Bake Mode in the Bake section (table below).
- Click Bake. The structure is replaced by the baked result. Ctrl+Z brings it back.
| Bake Mode | Result | Use for |
|---|---|---|
| Single Mesh | One Nanite mesh with merged simple collision. | Short runs, hero pieces |
| Per Segment | One mesh for every Bake Segment Length of spline. | Long perimeters, streaming, culling |
| Keep Instances | A plain actor that keeps the instanced components. | Hand-editing single pieces |
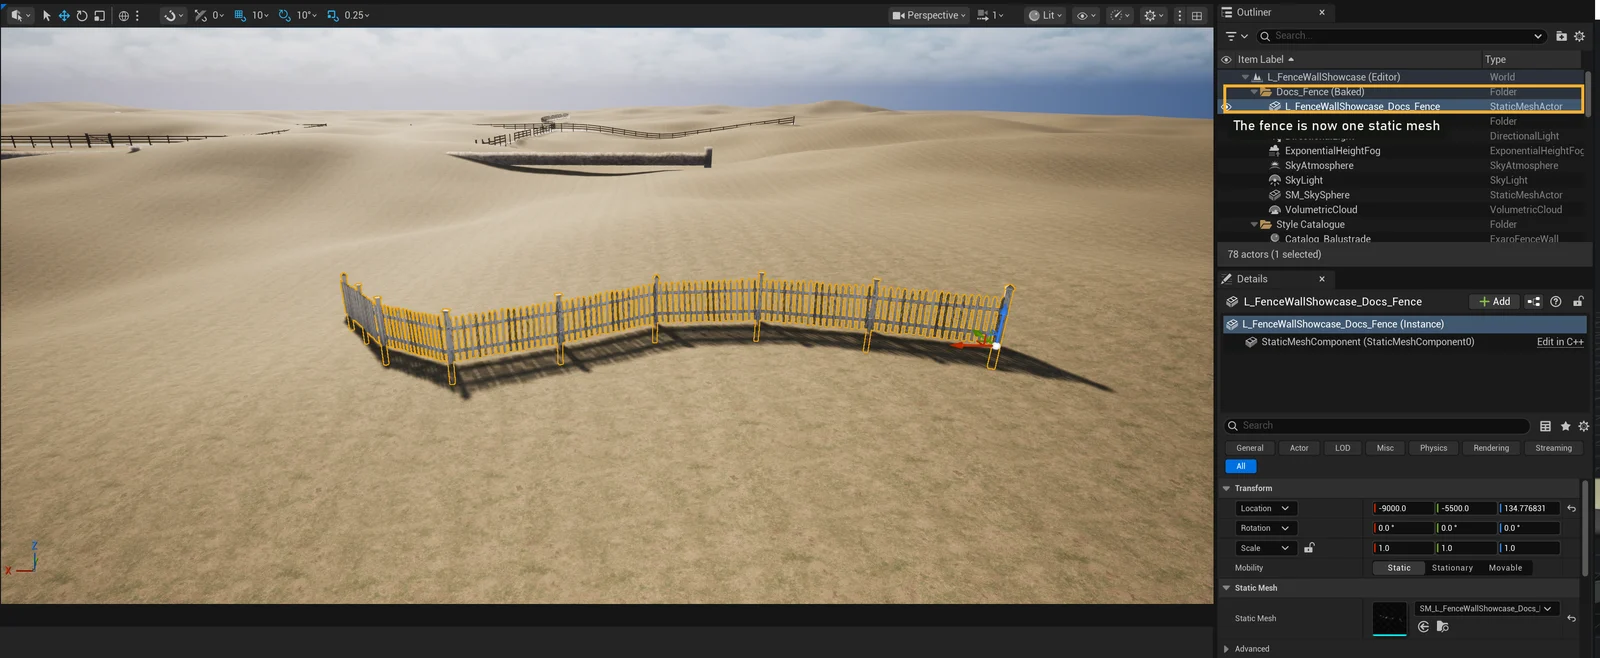
You do not have to bake. Unbaked structures work in packaged games too; baking just removes the construction step and lets you edit the mesh.
The styles
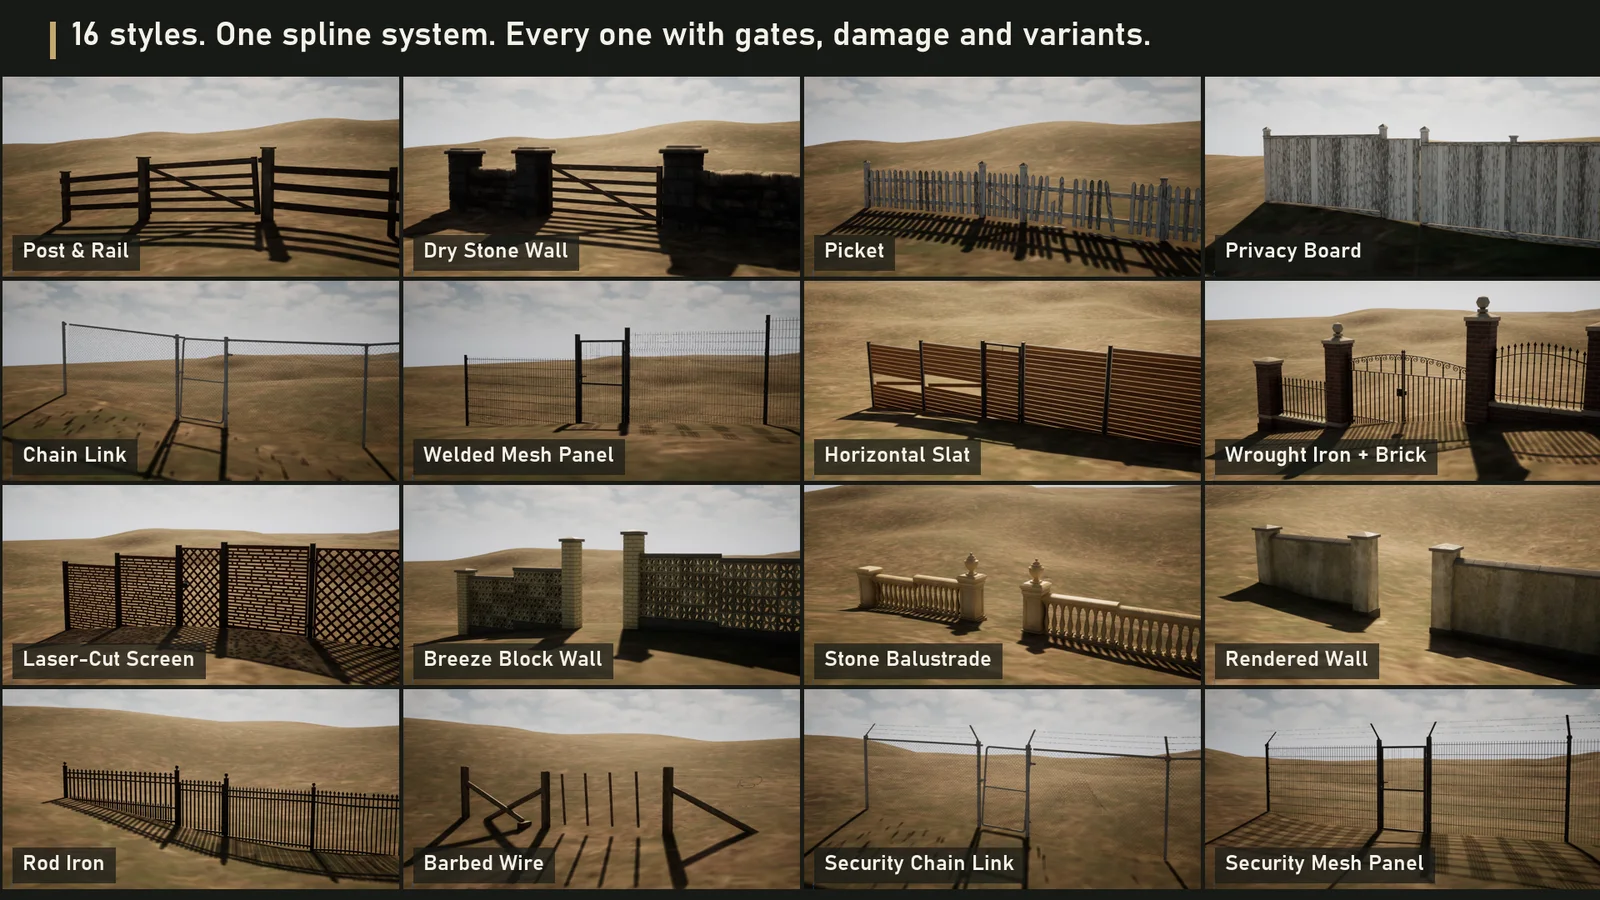
Post & Rail, Dry Stone Wall, Picket, Privacy Board, Rod Iron, Chain Link, Security Chain Link, Barbed Wire, Welded Mesh Panel, Security Mesh Panel, Horizontal Slat, Wrought Iron Railings, Laser-Cut Screen, Breeze Block Wall, Stone Balustrade and Rendered Wall. 29 colour variants on top. Every style also has a _LowPoly version with non-Nanite meshes and three LODs, for mobile, VR or projects without Nanite.
Make your own style
A style is a data asset. The quickest way is to duplicate one of ours (right-click → Duplicate), move it into your own folder and swap its meshes. To start from nothing: Content Browser → Add → Miscellaneous → Data Asset → Exaro Structure Style.
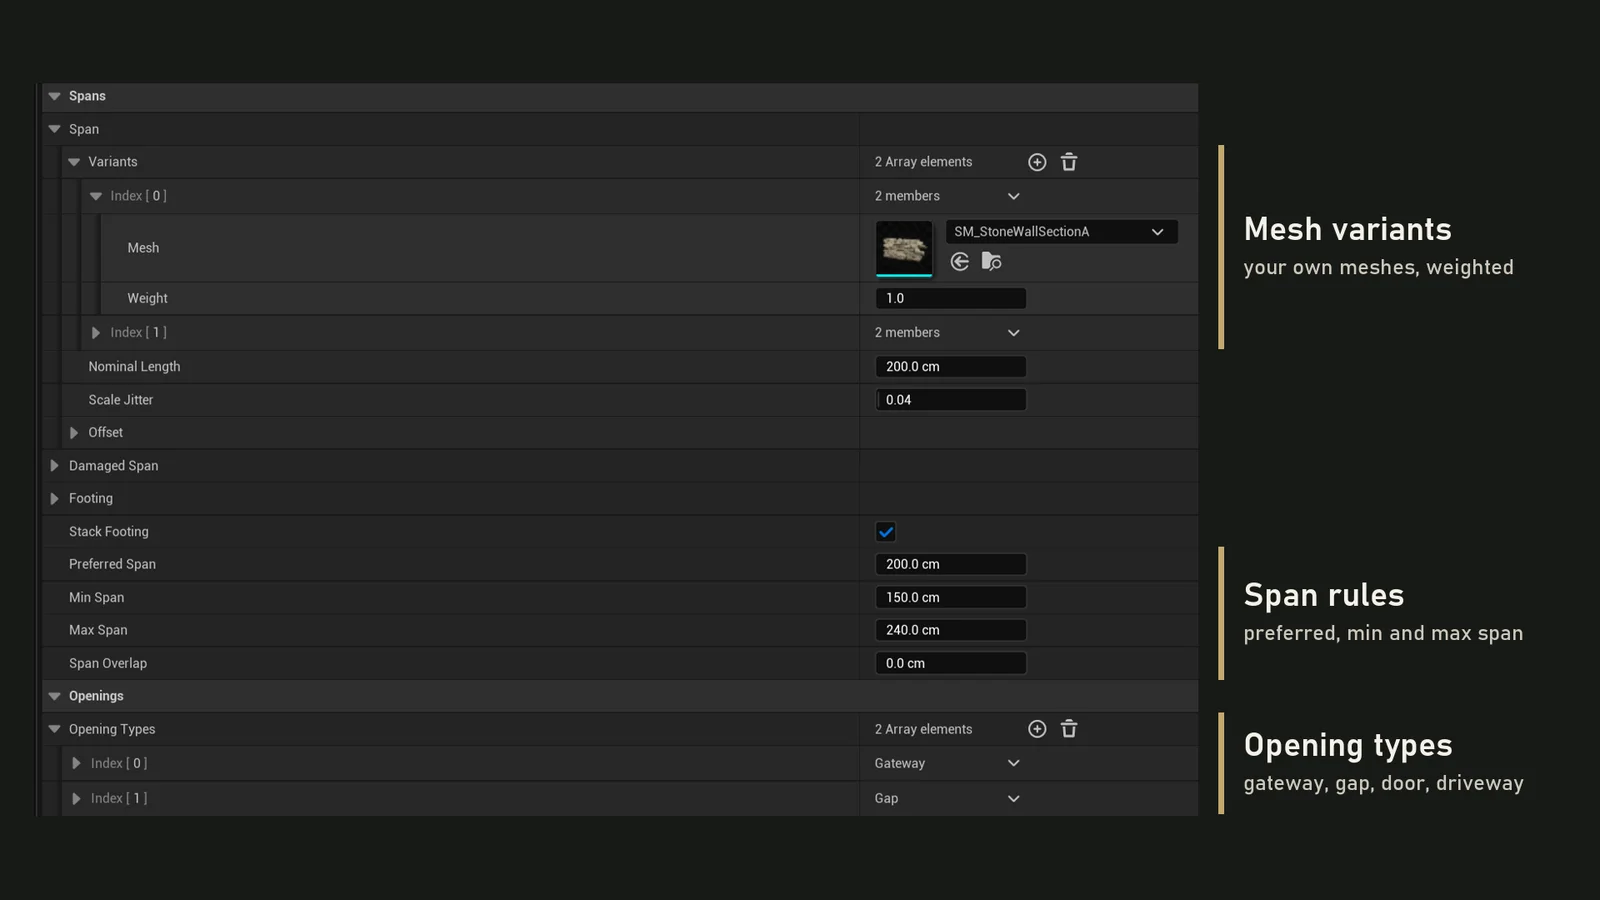
- Style Name: if set, the style appears in Place Actors → Exaro Structures.
- Node, Corner Node, End Node: posts and piers. Pivot at the bottom centre, at ground level.
- Span and Damaged Span: the panel between two posts. It runs along +X from one post centre (x = 0) to the next (x = Nominal Length), base at z = 0. It is stretched to the real spacing.
- Preferred, Min and Max Span: how far apart posts go.
- Footing: hangs below z = 0 and fills under Step and Level spans.
- Opening Types: a name, a default width, a fill mesh (empty for a gap) and its own posts.
- Decorations: caps, finials and toppers on post tops, at span centres, at intervals, or fitted post to post.
- Material Swaps: recolour without duplicating meshes. This is how our colour variants work.
Every slot takes several weighted meshes plus offset and scale jitter. Editing a style updates every structure that uses it, live. Meshes from other packs you own work too.
Blueprint and Python
The actor is ExaroSplineStructure. Useful calls: Generate, AddOpeningAt (a gate at a world location), GetInstanceCount and GetGeneratedComponents. In editor scripts, ExaroStructureEditorLibrary.BakeStructure bakes a structure.
import unreal
eas = unreal.get_editor_subsystem(unreal.EditorActorSubsystem)
fence = eas.get_selected_level_actors()[0]
fence.set_editor_property("style", unreal.load_asset("/ExaroFenceWall/Styles/DA_Style_DryStoneWall"))
fence.generate()
Performance
Structures render as instanced static meshes, so a kilometre of fence is a handful of draw calls. Collision is simple and separate from the render mesh: one box per intact span, post or pier, up to eight convex hulls on collapsed sections, and none on rubble and caps.
Troubleshooting
The fence floats or sinks into the ground
The ground is found with a World Static trace. Make sure your landscape or terrain mesh has collision. Other Exaro structures are ignored.
The Exaro Structures tab is missing or empty
It sits under More in Place Actors. Styles are listed once the editor has finished loading assets; if it is empty, close and reopen Place Actors.
Meshes look blocky or are missing
Nanite is off or the project is not on Shader Model 6. Turn on SM6 (step 1) or use the _LowPoly styles.
I can't see the plugin's content
In the Content Browser, open Settings and tick Show Plugin Content.
Need help?
Email [email protected] with your engine version and a screenshot.